I felt like trying to build a cheap terrain project this evening, so I set about building a Mutie tent, inspired by the card ones in the Digganob box.
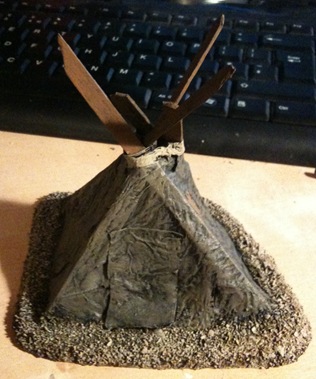
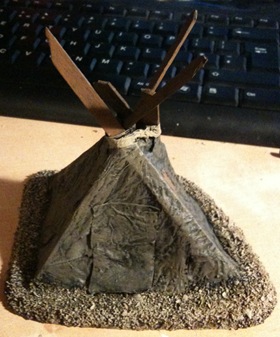
As you can see, the end result isn’t too bad.
These tents are fun to make, cost basically nothing (the paint and foamboard off-cut are probably the dearest) and best of all – they’re functional in-game:
Mutie tents block line of sight normally, and models on foot inside a tent cannot see out or be seen. Vehicles which move into a Mutie tent, voluntarily or otherwise, suffer no damage but stop moving immediately. A tent is destroyed if a vehicle moves through it. At the start of each subsequent turn, roll a D6. On a roll of 1, 2 or 3 the tent is wrapped around the vehicle obscuring the driver’s vision. The vehicle will move out of control as if it had no driver. On a 4, 5 or 6 the tent has been shredded and falls to one side, allowing the vehicle to move normally from then on (no further rolls are needed).
-MUTIE TENTS (Digganob, page 79)
To build one you will need the following:
- Wooden stirrers/ice lolly sticks (“popsicle sticks”)
- A few sheets of tissue paper, such as kleenex
- PVA glue (white glue, uh, “Elmers”?)
- A little string or wire
For basing you’ll need some card or foamboard and a bit of rough sand (I got mine from a nearby beach, it’s made of crushed shells).
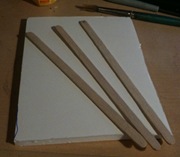 To start off with, I selected a suitable bit of foamboard for the base and decided the rough shape of my tent.
Then I chopped/cut at the wooden sticks in order to remove the rounded tips. On one end of each I created a short, sharpened point.
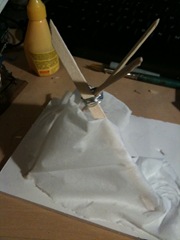
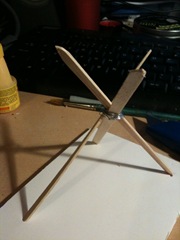 That done, I used the point to pierce the top layer of card on the foam board and positioned them so they crossed. Once that was done I used a little metal wire to wrap around the top, holding them together, although thread or string would have been just as good.
Later I added a Y-shaped beam made from two pieces spliced together, but I’ve no photos as I tried that after adding the first layer of tissue paper.
I’d originally planned to put a raised door on the tent (like the card ones) but I felt that it didn’t quite work using the materials I had to hand, so the plan was changed.
For this I used PVA glue, putting some around each hole in the foam board to secure the bases of the poles, I also applied a thin layer to each so that the paper would stick. Each piece would be carefully torn to about the right shape and then wrapped around.
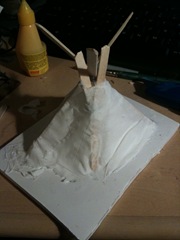
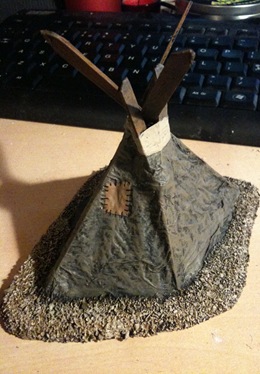
Then I used some diluted PVA glue (about the consistency of paint) and painted over the paper, taking care not to tear it. After it dried, I added a few details – a patch to cover where I made a small hole accidentally, a bigger patch for a door and a tightly wound piece to act as a draping strap around the top:
After that was done, I took a sharp knife and carved out a base from the foamboard, keeping a small edge, but not too much. I also made sure to make the edges sloping, rather than an abrupt end to the base.
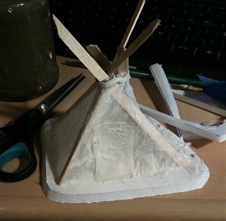
Using yet more glue I painted the base, making sure to not get much on the tent (which was dry by this stage). Dunking it in sand and tapping off the excess gave the result you can see in the following photo.
 At this stage I should probably share how I kept moving so quickly – I cheated. I had a hair dryer with me the whole time and would use it to quickly dry the glue (and later the paint) so that I’d be able to keep going at a decent pace. This probably prevents it from being as sturdy as it could be, but whatever – it’s a model and should be handled with care regardless.
Next up was the undercoat. In this case I used Signal Black “Monster Premier” spray paint. I give the brand because it’s paint designed for graffiti. If you’re in the UK or anywhere else that sells that gods-awful Plastikote crap, never buy it. It’s high pressure, low quality and drips like crazy, not to mention being very expensive. I think I paid about £2.95 per can of Monster, available from their site. This stuff is double-thickness (so each can contains a fair bit), it’s also hard-wearing and sticks to just about everything, 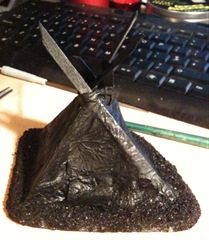 no cleaning or preparation required. Lastly, it’s low pressure, this means you can easily spray small bursts carefully with it – ideal of going over those bits you missed!
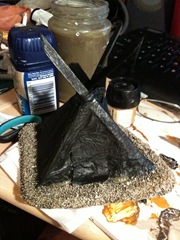
Oh, one more thing – because it’s designed for graffiti, it dries very quickly. This stuff will be dry to the touch within a minute or so. I went over mine with a hair dryer and then snapped this photo.
Here I’ve painted the base with a watered-down dollop of “Snakebite Leather” (Citadel) although I often use “Leather Brown” (Vallejo). I’ve also found that for bigger pieces, “Sand Brown” from Monster Colors is about right.
Once that was dry (hairdryer to the rescue!) I drybrushed on some paint from one of my Dulux tester pots, “Cookie Dough”.
You may of course want to base and paint yours differently.
To paint the wood I used Bestial Brown or equivalent, watered-down. A mixture of browns drybrushed onto the tent itself gave the colour you saw at the start of the article (I used a fine-point permanent marker to do the stitching on the little patch).
There you have it, one simple Mutie tent!
Tags: Muties
Leave a Reply