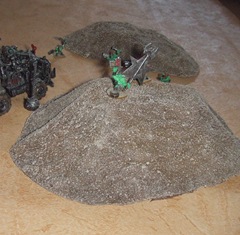
 When I was first starting out in wargaming I was 12, I didn’t have much money, nor did I have access to much in the way of materials. So today I’ve written a guide for my 12 year-old self, or anyone in a similar position, to get some cheap terrain on their board.
These hills are easy to make and about as close to free as it’s possible to get. They’re relatively sturdy but are also light-weight, which is hopefully a good thing.
You will need the following:
-Flour
-Water
-Scrap paper
-Scrap cardboard
-Cardboard toilet rolls
-Some kind of tape (sellotape, ducttape, etc..)
-PVA glue or similar
-Sand
(-Paint)
You’re better off making more than one hill at a time as it seems to be virtually impossible to make a small amount of papiermâché glue. We made two, but that was mostly due to limited space and time. I may well make some more soon. A big thanks to Depiff for building these with me, always ready to lend a hand, it’s appreciated.
Step one: Make some papiermâché glue
Planning can wait until later – let’s get some raw materials on the go!
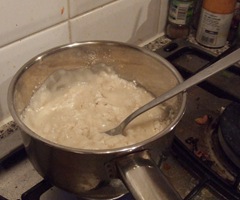
Heat up some water in a pan, it doesn’t need to be boiling, just kinda warm. Take a small amount of plain flour (other kinds probably work too) and drop it into the water.
I say “a small amount” because this is about ratio, not about mass. I used 100ml of flour which was far too much for this project. Try 25ml or 50ml. The water should be 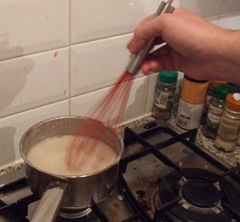 five or six times greater (i.e. 5:1/6:1) so 300ml water or 600ml, respectively.
You’ll need to give it a good stirring and perhaps add more water if it’s getting too thick, it’s all a bit trial-and-error!
A minute or two later you should have a goopy white/grey mass. Pour it out into a bowl and set it aside to cool for a few minutes, you’ve now got time to plan.
Step two: Planning
You’re going to have to establish the height of your hills and the general shape and size. The first hill Depiff and I made was going to be quite a tall one, although this was a little unintentional. The central plateau of it is 5.5cm tall, which doesn’t sound that tall but is deceptively tall for a small hill.
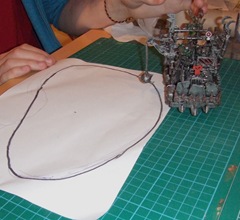
Draw out a basic outline, ideally with a model to hand for scale purposes. At the same time decide whether this is going to be a bumpy hill, a crag, a cliff, etc..
Step three: Support structure
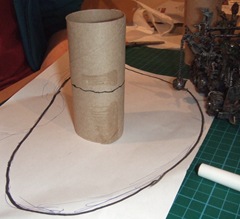
The toilet rolls are going to be your support columns inside the hill. Draw a rough line around where you reckon the hilltop should be and compare it to a vehicle. As I mentioned a moment ago, that line is 5.5cm from the base.
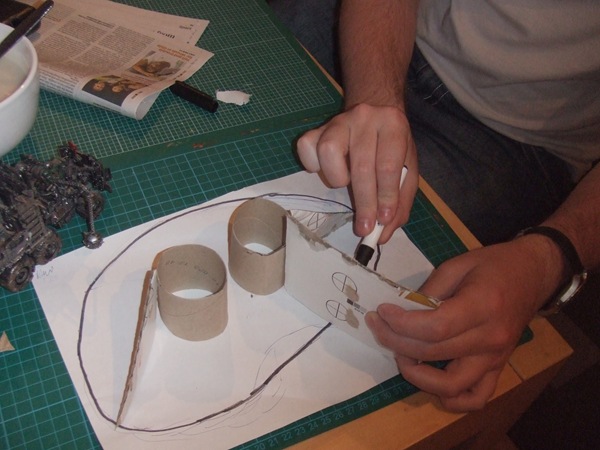
Next up, flatten the roll and use a knife or some scissors to slice it into the relevant height. You’ll probably use multiple toilet rolls for this, but that’s just fine, the more support, the better.
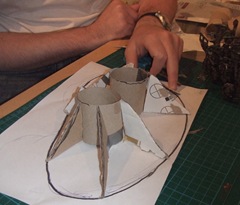
Now you’re going to need that scrap card. It doesn’t need to be thick – card stock, corrugated cardboard, whatever really. These are going to provide structure for the papiermâché to cling too. Try to avoid sharp points as they’ll show up. Slice it into triangles and angled pieces and tape them onto the toilet rolls.
They don’t need to be particularly sturdy as they’ll get entangled with the papiermâché , holding them in place. The more you use, the more defined your structure will be. Some things can be fixed later, but it’s better if you have a vague idea of what you want your hill to look like before you start coating it.
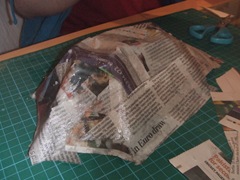 Step four: Papiermâché
Now comes the messy bit, which is why there’s not many photos – both Depiff and I had our hands covered in papiermâché glue and couldn’t really stop to take photos. You don’t really need much direction at this stage though – take a strip of paper, dunk it in the glue, drape it over the structure, repeat.
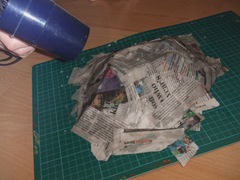 Some long pieces work well for establishing a basic structure, then smaller pieces can be used to add more well defined pieces.
To get the process done faster, use a hairdryer to dry the piece (as we so often do when building things). Once it’s relatively dry, add more papiermâché.
I would recommend doing this on a surface like a cutting mat – it can be picked up, rotated, and peeled away. We stuck our hill to it and then trimmed the scraggly edges.
Step five: Drying and basing
I’d recommend leaving your hill to dry overnight, unless you’re incredibly aggressive with the hairdryer. We tried to dry ours at a very rapid pace but it still took quite a while. The results weren’t bad though, so no complaints.
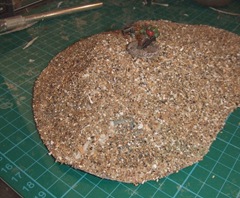 Once it’s dry, dab on some PVA glue and dunk the whole thing in sand. Make sure you cover the entire thing as adding more glue later is irritating, but you knew that already.
Now you’ve got a choice – you can keep it as it is, covered in sand, or you can paint it. Personally I prefer my hills painted. It does have the advantage of holding the sand in place a little better, but it’s by no means compulsory.
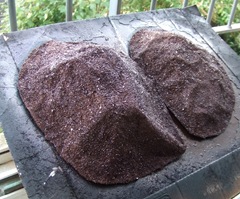 (Optional) Step six: Painting
I undercoat mine with a dark brown, then give them a moderate dusting of a colour approximating Snakebite Leather, followed by drybrushing with a lighter colour.
I’m not going to say this is the definitive method as I am fairly sure I could have painted them differently to make them look better, but I’m not going to repaint them. They’re good enough for me!
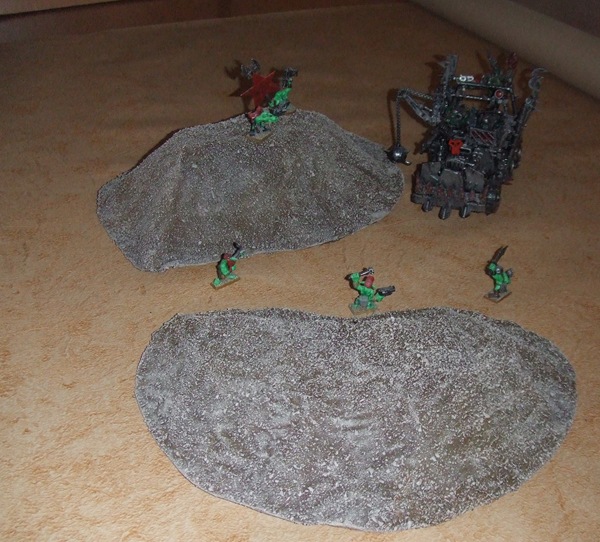
Here’s the finished hills:
Do you like them? Do you hate them? Could you teach me how to do better?
Comment and let us know!

January 1st, 2012 at 15:48
cool idea. But since these dunes are made of paper (and I know that the mache glue will give it more density), is it easy to accidentally poke holes into the finished product?
January 1st, 2012 at 16:20
The amount of layers of paper and the sand tend to prevent problems arising. But to be frank I’m not sure how there’d be a risk of hole pokage during normal usage.
The edges sometimes get a bit frayed but that’s about the worst of it.
I should probably post pictures of the progression of this method as I recently made a hill that’s absolutely massive. It’s pretty sturdy.
January 2nd, 2012 at 23:18
How high on average do you build these dunes?
January 2nd, 2012 at 23:20
I’m staying with my folks at the moment so I can’t measure them but the big hill I’ve just built is a toilet roll in height.
I would imagine that one could build them much taller than that. I’m considering building one that’s about 24″ tall or so.
September 19th, 2016 at 20:59
Thank you for posting this. It’s incredibly helpful.