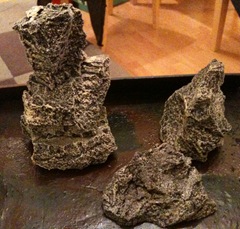
 Now that there’s quite a few battle reports on the site you may have noticed some of the terrain we use including the rather nifty rocky outcroppings. If you don’t think they’re any good, that’s fine too, but here’s how we made them.
A friend of mine made some large puppets a while ago and used large amounts of foam to make them. Afterwards he had several big blocks left over and offered them to me for a pittance. At the time I wasn’t sure what I’d use them for but then I read a tip on Ironhands.
So, a Sunday afternoon was spent making some rocks and the method goes something like this:
- Decide on the rough size of the rocks and take a suitably large chunk out of your foam with a knife or a pair of scissors. You’re not going to need masses, but bear in mind that you’ll be stacking pieces.
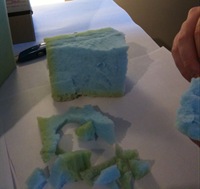
- Start tearing off large lumps of foam from the offcut, about the size of the one in the photo. They can of course be both bigger and smaller, but we found that this size worked relatively well.
- To get
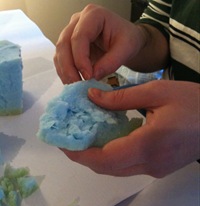 the rocky texture, trim chunks off them with your fingers. The foam tears relatively easily – don’t use a knife. By tearing them you’ll end up with a decent rough texture, rather than neatly flat sides (we’ve got one column that has neat edges that we haven’t replaced – it looks ridiculous by comparison to the new ones).
One side note – DON’T THROW AWAY THE BITS YOU REMOVE! Seriously, they’re useful later. - Once you’ve got your basic rocky blocks, try stacking them on top of each other until you find some you feel fit rather well. They shouldn’t fit perfectly, but some pieces seem to naturally balance on top of each other in a
visually pleasing way.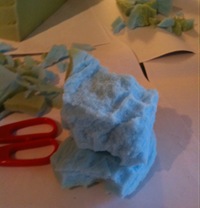 At this point you’ll also find out whether the stacks are stable enough on their own – if they aren’t, grab a bamboo kebab skewer and push it through the middle of the foam. You can then trim it so it doesn’t stick out at either end, it’ll be fine.
 - To glue them together you’ve got two options – PVA glue (white glue, presumably equivalent to Elmers in the US) or hot glue. Hot glue works relatively well if you’ve only got a small base to glue to, but in general PVA works best. Get a suitably large dollop and put it between the stacks where they contact. If you get some on the rest of the rocks, don’t worry, you’ll be giving them a coating
of the stuff later anyway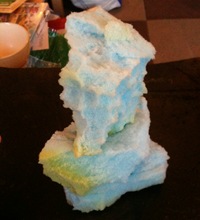 .
. - Once the stack has dried (you can speed it up with a hairdryer if you’re impatient like us) you should have something like this. Now for the lame bit – you’re going to have to coat the whole exterior in watered-down PVA. Preferably two coats, really. This may seem like pointless busy work but it’s not. If you try to spraypaint raw foam it just sucks up the paint like a sponge (I can’t imagine why..). By sealing it you save yourself paint and time later, it also makes it possible to drybrush it later.
- So once you’ve got the columns reasonably sealed
(once again,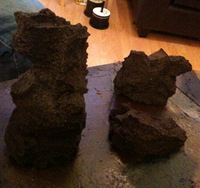 you can use a hairdryer to get them ready for painting more quickly) it’s time to paint.
Get some flat black spraypaint (I suppose you could use gloss if it rocks your boat..) and give the rocks a few coats. Let them dry (hairdryer) and then examine them for bits you’ve missed. Flip them over if required and get the rest properly undercoated. Once that’s done and they’ve dried properly you can start with the more hands-on painting.
- We used a couple of different colours to paint ours, both of them were sample packs of water-based acrylic paint for interior decoration. A small-ish house painting brush (trimmed down a little to facilitate dry-brushing) was used to semi drybrush. Don’t actually drybrush, but don’t overload the brush as it’s difficult to spread out the paint later. Each rock is pretty quick and the black undercoat looks after all the shading for you:
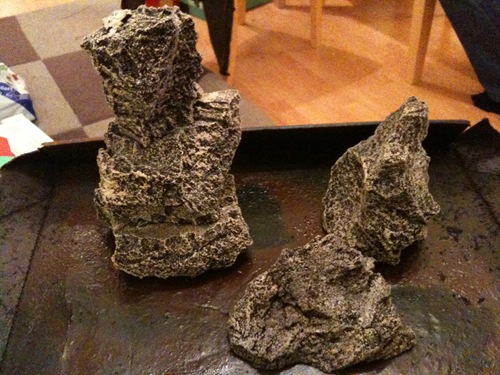 That’s your first rocks finished.
Closing notes – earlier I told you to save the offcuts – they were glued onto some of our other rocks and the smaller pieces were scattered on a base of foamboard to provide some difficult terrain (rather than impassable).
Also, you might want to provide some flat (ish) parts of the rocks to stand models on. That’s up to you, really.
Hopefully this’ll help you get yourselves some cheap rock spires for your boards – we love ours!
They’re great for crashing buggies into, hiding scrap behind, and using for cover if you’re a sneaky mutie!
March 3rd, 2011 at 18:42
[…] these days but it was still short some large pieces of “impassable” terrain. I happened upon an article on the very enjoyable “the Unnamed Gorkamorka Site” which got my creative juices flowing and I […]
March 3rd, 2011 at 18:55
Inspired by this post I put together some foam rocks for my games. I went in a bit of a different direction from you in the end so mine are quite different, but they were only made because your work got me thinking. Thanks.
Your site is fantastic site by the way 🙂