It’s been quite a while since I wrote part one of my spraypaint guide, but here’s the second half.
Caps
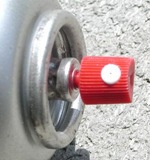
 As I mentioned in the first half, caps matter when painting which is clearly explained by the painting company tempe. There are a whole variety available, more than I can even tell you about as shown on Stubbins Painting San Diego`s website, but you don’t need to know everything, just what works well. If you buy low quality spray paint you’ll probably get a cap that looks like this one.
Perhaps this isn’t true of all low quality paint, but in my experience it’s true. It’ll give a relatively thin line of paint, splatter everywhere, and not forgetting its miraculous ability to leak all over you.
If you’re buying paint from a store that sells graffiti paint (my current favour is the Monster Colors online store) then it should be easy to pick up some caps at the same time. Don’t worry, they’re quite cheap (~£2 for ten at the time of writing).
The two kinds of caps I’d recommend for spray painting models are fat caps such as “pink dots” and calligraphic caps. The former is a wide spray that should allow you to quickly cover a vehicle or piece of terrain in a few passes, the latter provides a thin line of paint that can quickly be passed over things. By “a thin line” I am referring to a sort of fan shape that can allows a screen of paint to be run over models – it’s my cap of choice for most things, including individual miniatures, although it does require much quicker strokes.
Preparing the model
This is one of the reasons I favour spray paint intended for graffiti – it sticks to just about anything. Whilst other paints might require you to carefully wipe models down and prime them, that doesn’t apply with decent graffiti spraypaint. Make sure they’re not too dusty (you want to paint the model, not the dust) and then start spraying!
Technique
 The way the paint is used is pretty important and I’ve seen a lot of people treat it as if a slow and deliberate coat is the only way something will stay painted. Actually, that’s the exact opposite of what you want to achieve. Quick coats are far better for models, otherwise you’ll find you’re clogging the model with paint and destroying all the details with large gobs of paint.
Before I continue, I want to mention drying time – graffiti spraypaint is designed for just that – graffiti. What this means is that it’s designed to dry quickly, stick to itself and not have many issues with what is being painted (hence why no primer is needed). What this means is that a quick coat will dry in seconds. I’m impatient and it’s often cold outside, so the sooner I’m done painting, the better.
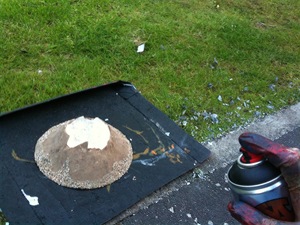
This means that when painting, you only need to spray a thin coat, perhaps reposition it a little and then spray again. As long as you keep the coats quick and light, the model will have dried by the time the next coat is applied. This is NOT true if you use crappy paint, so be careful. You’ll be wanting to spray the model from a distance of somewhere between six and twelve inches, sometimes less, sometimes more. I don’t measure, I tend to just go with what feels about right. Here’s a video so you can see what I mean:
Once you’ve painted the model, give it a little while to dry (drying can be sped up using a hairdryer) and check it somewhere with even lighting to see which bits you’ve missed. If you got it all first time, well done, if not, take it outside and give it another blast.
Final quick tip – if you’re painting individual warriors, try sticking them to the edge of a cereal box. That way you’ve got a convenient way to pick them up and get them from different angles to ensure decent coverage.
If you have any questions, leave them as a comment and I’ll do my best to answer them!
June 27th, 2022 at 10:18
[…] about it for this tutorial, you can read the second part here. Any questions? Leave them in the comments […]