desert-perilsA long time ago, back when Gorkamorka was still supported by Games Workshop, White Dwarf had an issue dedicated mainly to the Dark Eldar, the newest race for 40K at the time.

Personally I never liked them much and didn’t buy that issue. A friend had it and I must have looked through it once or twice. Unfortunately, recently I learnt that the hazardous conditions rules for Gorkamorka were published in that issue!

What are they?

Well, Necromunda had them, I think Mordheim too. They’re extra rules that make play a little more interesting. I don’t know whether I’m going to use them myself, but it annoys the hell out of me that they’re not available online, or anywhere else for that matter.

Thankfully, copies of White Dwarf 227 are still out there and I got my grubby mitts on one from an eBay seller. Score! Well, one scanning session later and I present it here for all to find.

As with all official stuff, it’d be nice if GW could see their way to publishing them on their own site, but until then, here it is:

Download PDF

(image by Nimrod Bar licensed under a Attribution-Non-Commercial-Share Alike 2.0 license)

12 Jan 2010

Make a Mutie tent

Filed under: Terrain

IMG_2329

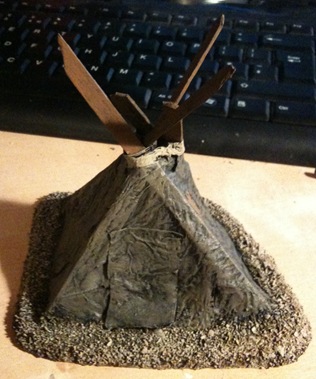
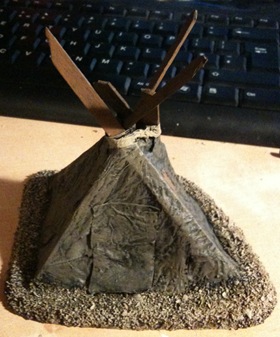
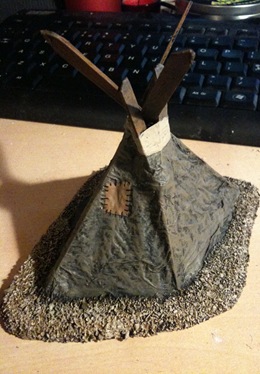
I felt like trying to build a cheap terrain project this evening, so I set about building a Mutie tent, inspired by the card ones in the Digganob box.

As you can see, the end result isn’t too bad.

These tents are fun to make, cost basically nothing (the paint and foamboard off-cut are probably the dearest) and best of all – they’re functional in-game:

Mutie tents block line of sight normally, and models on foot inside a tent cannot see out or be seen. Vehicles which move into a Mutie tent, voluntarily or otherwise, suffer no damage but stop moving immediately. A tent is destroyed if a vehicle moves through it. At the start of each subsequent turn, roll a D6. On a roll of 1, 2 or 3 the tent is wrapped around the vehicle obscuring the driver’s vision. The vehicle will move out of control as if it had no driver. On a 4, 5 or 6 the tent has been shredded and falls to one side, allowing the vehicle to move normally from then on (no further rolls are needed).
-MUTIE TENTS (Digganob, page 79)

To build one you will need the following:

  • Wooden stirrers/ice lolly sticks (“popsicle sticks”)
  • A few sheets of tissue paper, such as kleenex
  • PVA glue (white glue, uh, “Elmers”?)
  • A little string or wire

For basing you’ll need some card or foamboard and a bit of rough sand (I got mine from a nearby beach, it’s made of crushed shells).

IMG_2307To start off with, I selected a suitable bit of foamboard for the base and decided the rough shape of my tent.

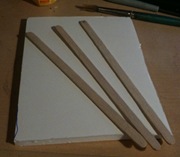
Then I chopped/cut at the wooden sticks in order to remove the rounded tips. On one end of each I created a short, sharpened point.


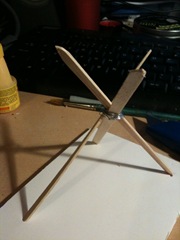
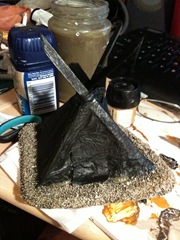
IMG_2314That done, I used the point to pierce the top layer of card on the foam board and positioned them so they crossed. Once that was done I used a little metal wire to wrap around the top, holding them together, although thread or string would have been just as good.
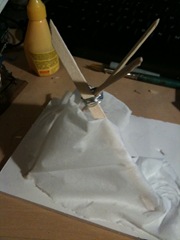
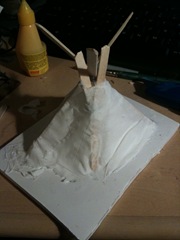
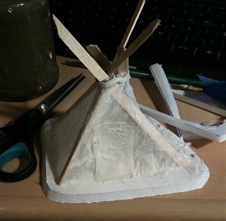
Later I added a Y-shaped beam made from two pieces spliced together, but I’ve no photos as I tried that after adding the first layer of tissue paper.

I’d originally planned to put a raised door on the tent (like the card ones) but I felt that it didn’t quite work using the materials I had to hand, so the plan was changed.


IMG_2316  IMG_2317

For this I used PVA glue, putting some around each hole in the foam board to secure the bases of the poles, I also applied a thin layer to each so that the paper would stick. Each piece would be carefully torn to about the right shape and then wrapped around.

Then I used some diluted PVA glue (about the consistency of paint) and painted over the paper, taking care not to tear it. After it dried, I added a few details – a patch to cover where I made a small hole accidentally, a bigger patch for a door and a tightly wound piece to act as a draping strap around the top:

IMG_2319

After that was done, I took a sharp knife and carved out a base from the foamboard, keeping a small edge, but not too much. I also made sure to make the edges sloping, rather than an abrupt end to the base.

Using yet more glue I painted the base, making sure to not get much on the tent (which was dry by this stage). Dunking it in sand and tapping off the excess gave the result you can see in the following photo.


IMG_2320At this stage I should probably share how I kept moving so quickly – I cheated. I had a hair dryer with me the whole time and would use it to quickly dry the glue (and later the paint) so that I’d be able to keep going at a decent pace. This probably prevents it from being as sturdy as it could be, but whatever – it’s a model and should be handled with care regardless.

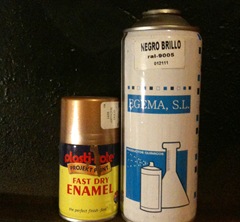
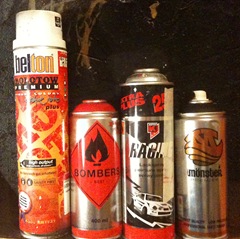
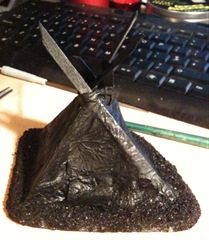
Next up was the undercoat. In this case I used Signal Black “Monster Premier” spray paint. I give the brand because it’s paint designed for graffiti. If you’re in the UK or anywhere else that sells that gods-awful Plastikote crap, never buy it. It’s high pressure, low quality and drips like crazy, not to mention being very expensive. I think I paid about £2.95 per can of Monster, available from their site. This stuff is double-thickness (so each can contains a fair bit), it’s also hard-wearing and sticks to just about everything, IMG_2323no cleaning or preparation required. Lastly, it’s low pressure, this means you can easily spray small bursts carefully with it – ideal of going over those bits you missed!

Oh, one more thing – because it’s designed for graffiti, it dries very quickly. This stuff will be dry to the touch within a minute or so. I went over mine with a hair dryer and then snapped this photo.


IMG_2325

Here I’ve painted the base with a watered-down dollop of “Snakebite Leather” (Citadel) although I often use “Leather Brown” (Vallejo). I’ve also found that for bigger pieces, “Sand Brown” from Monster Colors is about right.

Once that was dry (hairdryer to the rescue!) I drybrushed on some paint from one of my Dulux tester pots, “Cookie Dough”.

You may of course want to base and paint yours differently.

To paint the wood I used Bestial Brown or equivalent, watered-down. A mixture of browns drybrushed onto the tent itself gave the colour you saw at the start of the article (I used a fine-point permanent marker to do the stitching on the little patch).


   IMG_2329 IMG_2330

There you have it, one simple Mutie tent!

Tags:
10 Jan 2010

Da Necron Rayd

Filed under: Experimental, Scenarios

da-necron-rayd-image

One thing I hear a lot is that the Necrons appear in Gorkamorka. They’re not a playable faction, although they can appear in a battle and even then, there’s pretty much only one published scenario in which they appear, which happens to be the one available in the PDF below.

As the Necron legions sweep nearer and nearer to Mektown, they destroy mob after mob, until they find yours. The scenario is intended to be played as a grand last battle.

Download PDF

Some questions regarding the scenario, with answers from the author, Andrew Mcaleer.

Q) It says an Ork can pick up a gauss flayer from a dismembered Necron. When? When it’s down? Before it fades out of action?
A) Yes, unless the Ork is in base-to-base contact with the Necron, he will be unable to pick up the Gauss-Flayer as it will have faded away. (Get hand-to-handing if you want rare and meaty gunz!) This is most useful if your mob won’t be retiring at the end of the game.

Q) If it’s when the Necron is down and an Ork has his gun does it still have one if it gets back up again?
A) Correct, if its gun has been stolen, it’s a hand-to-hand only machine. Obviously, therefore, no Ork can steal another Gauss Flayer off it either.

Q) Can Necrons run/charge?
A) Necrons can indeed run and charge, just as in 40K2E.

Q) How far do destroyers move? Treat them like bikes? If so can they thrust?
A) Destroyers follow the rules for skimmers from the 40K 2nd Edition Rulebook. Their slow speed is 8″, Combat speed is 20″ and Fast is 30″. If you lack the 2nd edition 40K rules, treating as a bike is the next best thing.

Q) Destroyer armour penetrated. Do you roll on a damage table? If so which one?
A) The destroyer has its own damage table in WD216. on a 1-2 the Necron Warrior is hit, and the normal rolls for a Necron being shot then take place. If the Necron is killed, the Destroyer moves out of control until it leaves the table, is destroyed, or the Necron makes a successful I’ll be back roll.

On a 2-3 the Destroyer is hit. Roll a further D6 on the Tin’ead Destroyer Damage table:
Tin’ead Destroyer Damage Table(D6)

1 Weapon destroyed.
2 Engine Damaged.
Slow speed (8″) only from now on (or no thrusting if using bike rules)
3 Controls Damaged.
Roll a D6 every turn. On a 4-6 the destroyer moves as normal, on a 1-3 it moves as Out of Control (40K Rulebook: Skimmers) for that turn.
4 Crash!
The Destroyer moves Out of Control this turn and then crashes. Anybody under the Destroyer takes D3 strength 6 hits with a -2 save modifier.
5 Crash!
The Destroyer drops straight out of the air and is Destroyed. Anybody under the Destroyer takes D3 strength 6 hits with a -2 save modifier.
6 Spectacular Explosion!
The Destroyer moves Out of Control and explodes (blast 3″ radius) Anyone in the Fireball takes D6 strength 6 hits with a -4 Save Modifier.

Q) Metal Flayer
A) As for the Metal Flayer question I’ve seen elsewhere, yes, if you roll a 6 on either dice for Armour penetration, you can roll a further D6 and add that to your Armour penetration roll. That one was GW’s fault for not completely reprinting the Metal Flayer special rule in Gubbinz. It’s in WD218 (pg. 25) if you need the full text again.

(image by slworking2 licensed under a Attribution-Non-Commercial-Share Alike 2.0 license)

10 Jan 2010

Nob Uv Da Kop

Filed under: Experimental, Scenarios

da-kop This may well have been printed in the Citadel Journal, but we can’t find any reference to it. It was in Gubbinz, a very out of print magazine for Gorkamorka which only made it to a single issue. We’ve also heard that only 5000 were printed, so worldwide it’s not exactly easy to find.

Well, here’s the first scenario from Gubbinz, “Nob uv da kop”, written by Andrew Stickland. From what we’ve dug up he’s written material for Necromunda before, including a scenario or two and rules for “blind fighting”.

We don’t think these rules have been published online before, so we hope you enjoy this exclusive.

Everyone knows there’s piles of scrap all over the place out in Da Big Uz. But some of it is so dangerous to get to, only the toughest and bravest mobs will succeed in bringing it back and reaping the rewards in Mektown.

Download PDF

(Photo by J. Stephen Conn)

Nazgrab’s Yella Deff vs. Cuttas Ov Da Jib
Scenario: One of our ladz is missin’ (Da Uvver Book, scenario 7)

In a previous run in with Nazgrab and his boys most of the freebooters made it out, but one boy fell behind, Da Kaptin’s second in command, Grob. The poor bugger was not in a good way either, with a two crippled legs, a head wound and an old battle wound. Things could hardly get much worse for him, but Da Kaptin was not willing to deal with new recruits, so a full-on raid was staged.

Whilst the game lasted only five turns, plenty of blood was shed, even though only Nazgrab and Morduff were on the table, reinforcements not managing to make it in time for the brawl.

br-nyd-codj1

br-nyd-codj2Nazgrab took up position in full cover (-2 to hit) on the gate’s ramparts with Morduff eyeing the intruders through his single remaining eye (probably not helped by his huge iron mask, a result of a recent visit to da dok). The lack of ballistic skill of little concern to him, holding his two favourite choppas.

Their composure was short-lived, however, as Wabdash took the gate off its hinges, creating some rough terrain for vehicles but practically laying out a red carpet for warriors on foot. Freebootaz certainly know their way around kannons!

Nazgrab took aim at the trukk, doing his best to do some damage to it. Unfortunately, whilst he hit it (not hard with a BS of 5..), his shoota was just too damn weedy to do any harm.


br-nyd-codj3Knowing full well that Nazgrab couldn’t do much against them, the freebootaz advanced, moving their trukk around and disembarking, eager to reclaim their lost crewmate.

It was at this juncture that they got within Morduff’s reach and the vicious git dived in, tackling Da Banga’ and making enough of a mess of him that he was out straight away.

Having made short work of one freeboota, Morduff advanced on Wabdash, the plucky kannoneer. He didn’t fare much better, quickly going down to the relentless pummelling heading his way.

Da Kaptin on the other hand was having none of this and skilfully matched the defender blow for blow, leaving combat at a stalemate.


br-nyd-codj4


br-nyd-codj5Seeing the vicious hand to hand going on below him, a thought occurred to Nazgrab – there was a fight in his fort but he wasn’t involved in it!

Not to be bested by a mere boy, Nazgrab dived from his vantage point into the frenzy, taking down Da Kaptin in a flurry of precise blows from his trusty choppa. It’s not just for decoration!

Not content with that and seeing that the captive had been freed by Gutsmek, the nob took the burly bad mek out. Permanently as it would later become clear.

Then there was the escaping captive, presently armed solely with a knife. Short work was made of him.


br-nyd-codj6

With no foot warriors left on the battlefield, it was remarkable that the freebootaz nerve held, but grabbing their wounded they chose to scarper off the edge of the board, technically winning by the conditions we decided upon (they freed the captive, after all!).

Being the underdogs by 110 rating points, the win secured them a hefty 20 teef of extra income and a rather pleasant +9 experience point bonus for each surviving member. Unfortunately, whilst they’d got their crewmate back, it had cost them their bad mek, a rather vital mobster. To the job pole, lads!

br-nyd-codj7

Result: Victory to Cuttas Ov Da Jib