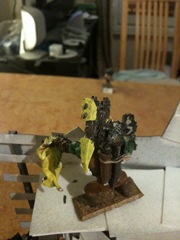
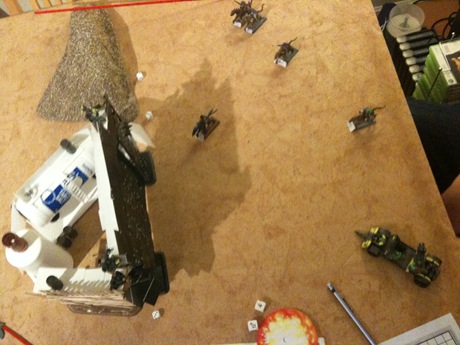
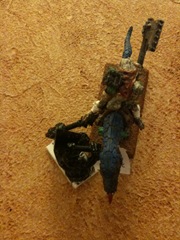
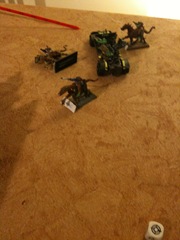
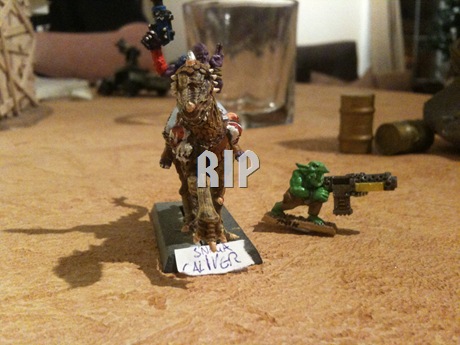
Here’s some rules written by Tim “Majere” Peers, found here originally. We’ve not playtested them ourselves but feel free to give them a shot and let us know how it goes!
Update: You can now get these rules as a PDF here.
Snorta Nob
Cost to recruit: 16 teef
|
M
|
WS
|
BS
|
S
|
T
|
W
|
I
|
A
|
LD
|
|
Snorta Nob
|
7
|
4
|
4
|
3
|
4
|
1
|
3
|
2
|
7(8)
|
Weapons: You may arm the Nob with weapons and equipment from the Hand-to-Hand Weapons, Armour and Stikkbombz lists.
Leadership: Your leader only becomes a fully fledged Nob once he has won a battle. His Leadership then rises to 8 automatically. Until he becomes a Nob your leader cannot attempt to buy custom jobs as the Meks refuse to deal with someone of such low status. Once he is a Nob other Orks make way for him in the street and don’t gob on him so much.
Herderz
Cost to recruit: 10 teef
|
M
|
WS
|
BS
|
S
|
T
|
W
|
I
|
A
|
LD
|
|
Herder
|
7
|
3
|
3
|
3
|
4
|
1
|
2
|
2
|
7
|
Weapons: You may arm the Herder with weapons and equipment from the Hand-to-Hand Weapons, Gunz, Armour and Stikkbombz lists. They may also use any Slaverz stuff except for the Grabba Stikk (not much good on boarz…)
Special: Herderz are responsible for training and looking after the ferocious and bad-tempered war boarz. Every Herder in your mob allows you to have three other Snortas (so with one Herder you may have a total of four gang members including the Herder himself). Herderz are exceptionally good at controlling their boarz, and so they are allowed to fire Gunz whilst riding. (see special rules for Snortas)
Snorta Boyz
Cost to recruit: 9 teef
|
M
|
WS
|
BS
|
S
|
T
|
W
|
I
|
A
|
LD
|
|
Snorta Boy
|
7
|
3
|
3
|
3
|
4
|
1
|
2
|
2
|
7
|
Weapons: You may arm your Boyz with weapons and equipment from the Hand-to-Hand Weapons, Armour and Stikkbombz lists.
Snorta Yoofs
Cost to recruit: 6 teef
|
M
|
WS
|
BS
|
S
|
T
|
W
|
I
|
A
|
LD
|
|
Snorta Yoof
|
7
|
2
|
2
|
3
|
3(4)
|
1
|
2
|
2
|
7
|
Weapons: You may arm your Yoofs with weapons and equipment from the Hand-to-Hand Weapons, Armour and Stikkbombz lists.
Toughness: Snorta Yoofs gain +1 Toughness when they get enough experience to become a Boy, just like other Yoofs.
(Pale) Green Rider: Controlling a boar is difficult even for a full-fledged Snorta Boy- for a lowly Yoof it’s almost impossible! If the Yoof fires a shot from a pistol, or if a Stikkbomb goes off within 4″ of the Yoof, then roll 2D6. If the total is greater than the Yoof’s Leadership, then his boar will Run Amok! (See special rules) When he becomes a Boy, the Ork is no longer affected by this rule.
Snorta Special Rules
Boarz: All members of a Snorta Mob ride ferocious War Boarz. Exactly where these unpleasant porkers came from isn’t clear, but just like Squigs they always seem to turn up wherever Orks do.
Movement: An Ork riding a War Boar moves at 7″. Snortas can charge and gallop in exactly the same way as muties, but since Boarz are considerably less co-operative than Mutie Beasts, Snortas cannot usually fire on the gallop, or set Overwatch. Snortas cannot hide.
Shooting from a Boar: Snortas have a 90 degree fire arc to the front just like a footer. It usually takes an Ork at least one hand to keep his Boar going in vaguely the right direction, so Gunz may not be used from a Boar, except by Herderz.
Shooting at Snortas: Shooting at a Snorta follows the same procedure as normal. If the Snorta moves at over 10″, there is an additional -1 to hit modifier due to the speed (and dustcloud!) Snortas are not driven off by enemy fire like Muties are.
Close Combat: Snortas gain +1 Attack in close combat due to the viciousness of the Boar. (this is included in their profile) The close combat is otherwise worked out as normal.
Saving Throws: A Snorta gains +1 to his saving throw (giving a save of 6+ if no armour is worn)
Picking up and carrying Scrap Counters: Snortas must stop for a turn to pick up Scrap just like Muties, they suffer no movement penalty for carrying it and may only carry one counter.
Attacking Vehicles: Snortas do not dismount in battle. When they attack a vehicle they test initiative as normal, but do not board the vehicle. A Snorta who successfully attacks a vehicle fights a crew member as normal, but the crewman will only fall off his vehicle if he goes down, and the Snorta is simply moved out of contact with the vehicle if he loses, in addition to any wounds he may take. The vehicle may move away from the Snorta in its next movement phase as normal, but may not sideswipe the Snorta.
Snortas and Forts: Snortas cannot climb fort walls, and therefore will need to destroy the gate of the fort to get in. Snortas count as footers when trying to get through holes in the gate.
Boar Amok! Boarz don’t like being ridden, they don’t like Orks and they don’t like each other. They’re not that fond of Muties, Grots, Diggers, rocks or Trukks either. In fact, about the only thing Boarz do like is running about biting things. Should something happen to sever the bond between Ork and Boar (in other words, should the Ork let go of the Boarz ‘urtybitz) then the boar will Run Amok. The following things cause this amusing event:
Rider goes down: A Boar automatically Runs Amok if its rider goes Down. If the rider goes Out of Action, the Boar runs away- remove the model as usual.
Gets Bitten: Amok Boarz bite everything in sight, including other boarz. If an Amok Boar moves within 1″ of another Boar, then the rider must pass a Leadership test or his Boar runs Amok as well!
Gets Rammed: Any attempt to Sideswipe or Run Over a Snorta will not be taken well. Once the attack has been resolved, the rider must pass a Leadership test to control his Boar, even if the attack missed or did no damage.
Grabbin’ Scrap: Grabbing a Scrap counter means letting go of the Boar. Oops. The rider must test his Ld after digging up some scrap. If he fails, the Boar runs Amok, but the Scrap is still collected.
Amok Boarz: An Amok Boar moves D6″ in a random direction at the start of each of its movement phases. If the rider is still active, he may not shoot- he’s too busy hanging on, shouting and hitting the Boar on the head! In the recovery phase, the rider may make a Leadership test, and if he passes then the Boar comes back under control and may move normally from then on. If an Amok Boar moves into an enemy model then the Snorta counts as charging and the Boar immediately comes back under control- it’s found something to bite! Amok Boarz also recover and fight normally if charged by the enemy. If an Amok Boar moves into the enemy whilst its rider is Down, then the rider is taken Out of Action and the model is removed. Amok Boarz will never attack vehicles- if its movement would move the Boar into a vehicle or other obstacle the Boar stops 1″ away.
Snortas in Campaigns
Snorta Scenarios: Snortas are treated exactly like a normal Ork mob when deciding which scenario to play. Whenever a scenario allows the use of a vehicle, the Snortas get two warriors instead, plus any extra warriors allowed. If attacking in Da Trap, the Snortas deploy in the same way as Muties.
Serious injuries: Snortas take Serious inuries as normal, and may visit the Docs as normal. The only exception is with a Leg Wound- the Snorta is not slowed down because he’s riding a Boar, but he does suffer -1 Ld per Leg Wound when trying to stop his Boar running Amok- he can’t kick it quite as hard anymore..
Kustom Legs: Kustom Legs have the following effect on Snortas:
- Peg Leg: -1 Ld when testing to control a Boar
- De-Lux Kicking Leg: The warrior does not gain the Kick attack, but he does receive +1 Ld to control his Boar. (Kop dis, piggy!) This may take his leadership for the test above 9! The warrior also gains an extra 1″ movement in any Boar Race he takes part in.
- Telescopic Legs: The warrior’s movement is unchanged, but he can use his extra long legs to climb Fort walls (Boar and all!) or board vehicles like a normal footer if he wishes! Understandably, this upsets his Boar, and he must test to control it if he does not end his move in close combat.
- Gyro-Stabilised Monowheel/Tracks/Wheels: The warrior is no longer able to ride his Boar! He is subect to all the normal rules for the bitz, but loses all bonuses from the Boar. (Including one Attack) He is allowed to use Gunz now, however.
Death of a Herder: If a Snorta mob ends up with too few Herderz, it’s bad news all round. The Boars won’t get fed or looked after properly, and that makes them mad! Until the mob has enough Herders again, every member of the mob except for any remaining Herders suffer from the Pale Green Rider rule like Yoofs!
Leadership Challenges: The only sort of infighting a Snorta Mob can suffer from is a Leadership challenge. Herderz never challenge for leadership- they’re far to busy keeping the Boars in line. Being Snortas, the Boyz don’t settle the argument in the traditional way in Mektown. Instead, roll on the following table:
1-2: Boar Race
3-4: Mounted Fight
5-6: Bucking Boar Riding
Boar Race: Who can ride fastest on a Boar? The Boyz set out across the desert to find out! Put the two Snortas side by side, and mark a finish point 48 ” away. Both Snortas move D6″ plus their Toughness towards the point simultaneously- first one there wins! If both Snortas arrive during the same move, then the whole thing degenerates into a Mounted Fight!
Mounted Fight: The Boyz fight it out in close combat with all their ususual weapons and equipment. Neither side counts as charging. The Snortas gain experience for wounding hits as normal.
Bucking Boar Riding: The Boyz are each lowered onto the biggest, meanest Boar the mob has, and someone gives it a hefty whack! Both Boyz struggle to hang on longer than the other one. Roll 5D6 for each Boy in the challenge, and count how many are equal to or less than the Boy’s strength. Whoever scores the most wins! If the result is a tie, then both Boyz pick themselves up and start the contest again.
Snorta Advances
The maximum profile for a Snorta is as follows:
|
M
|
WS
|
BS
|
S
|
T
|
W
|
I
|
A
|
Ld
|
|
SuperSnorta!
|
7
|
6
|
6
|
4
|
5
|
3
|
5
|
4
|
9
|
Note that the bonuses for riding a Boar are included.
Snortas gain experience exactly like other Ork Mobz, although they get slightly different skills:
Gorkasnortas
|
Muscle
|
Ferocity
|
Riding
|
Cunnin’
|
Dakka
|
Odd
|
|
Nob
|
Y
|
Y
|
Y
|
Y
|
Y
|
N
|
|
Herder
|
Y
|
N
|
Y
|
N
|
Y
|
Y
|
|
Boy
|
Y
|
Y
|
Y
|
N
|
Y
|
N
|
|
Yoof
|
Y
|
Y
|
N
|
N
|
N
|
N
|
Morkasnortas
|
Muscle
|
Ferocity
|
Riding
|
Cunnin’
|
Dakka
|
Odd
|
|
Nob
|
Y
|
N
|
Y
|
Y
|
Y
|
Y
|
|
Herder
|
N
|
N
|
Y
|
Y
|
Y
|
Y
|
|
Boy
|
N
|
Y
|
Y
|
Y
|
N
|
N
|
|
Yoof
|
N
|
N
|
Y
|
Y
|
N
|
N
|
Skills Notes
Snortas benefit from skills in the same way as other mobs, and have access to Riding skills instead of Driving. The following skills are affected:
Gotcha! (Ferocity Skill) Re-roll this skill.
Duck N’ Weave: (Cunnin’ Skill) Works as normal as if the Snorta was on foot.
Play Dead: (CunninSkill) Re-roll this skill (Boars can’t act!)
Tinkerer: (Odd Skill) Re-roll this skill.
Fixer: (Odd Skill) Re-roll this skill.
Back Seat Driver: (Odd Skill) The warrior has an exceptionally loud voice and intimidates Boars any chance he gets. Any Snortas within 6″ of the Snorta with this skill may use his leadership when trying to control their Boar.
Expert Aim: (Riding Skill) Treat this skill as if it was Hipshoota (Dakka Skill)- the warrior may fire while galloping at -1 to hit. If the warrior has both Expert Aim and Hipshoota, he may fire at the gallop with no penalty.
Going to Mektown
Snortas go to Mektown just like other Orks to get weapons Kustmised and warriors patched up. Snortas have no vehicles to Kustomise, but particularly brave Snortas may decide to take a Boar to the Doc in the hopes of creating one of the legendary Cyboars!
Docs and Boars
A single Boar may only ever visit the Doc once, since Docs refuse to mess with each other’s work. The procedure is risky at best, but there are plenty of Boars to spare, so no-one gets too upset if the Doc makes a real hash of it. Replacement Boars cost 4 teef, and the rider suffers from the Pale Green Rider rule for the next game whilst he gets used to the new Boar.
If you decide to take a Boar to the Doc, roll on Porky’s Day In:
Porky’s Day In Table
|
D6
|
Result
|
|
1-2
|
Does E’ do that often? The Doc has messed up badly. The Boar is so much spare ribs. The Doc has the decency not to ask for any teef for his work, but a new Boar will cost 4 teef. |
|
3
|
Down Boy! The Doc performs the Serjery and everything goes well, but the Boar wakes up before the Doc expected and goes berserk! Roll on the Kustom Boar table to see what happens to the Boar. The Doc demands D6 teef for the work, plus D6 more for the damage to the workshop. |
|
5-6
|
Job’s a Good ‘Un.. Waaagh da Doc! The Boar wakes up bang on schedule, and a new Cyboar is born. Roll on the Kustom Boar table to see what happens next…. |
Assuming all goes well, roll on the Kustom Boar table to see what happens next.
Kustom Boar Table
|
D6
|
Result
|
|
1
|
Frankenboar! The Doc had some bits lying around, and used them. Then he borrowed some from the Mek next door. Then he took a few bits out….. The result is a deeply weird Boar! Add D6-3″ to the Movement of the warrior riding the Boar (this may reduce his movement) Re-roll this modifier before each game. The warrior gains +1 to his saving throw due to all the metal bits. Unfortunately the Boar has lost his edge a bit- the rider must pass a Leadership test to make the Boar gallop or charge. On the plus side, this Boar will never Run Amok. |
|
2
|
‘Eavy legs. The Doc tinkers about with some De-Lux kicking legs to see what he can come up with. The resulting metal-limbed monster loses 1″ of movement, but gives the warrior riding it another extra close combat attack! |
|
3
|
Bikeboar! Vroom! The Doc has replaced the Boar’s rear legs with a Bike wheel, and added a hefty gas engine connected to the Boar’s digestive system. The resulting Boar lives in mortal fear of running itself over! The Boar gains +2 to its Movement, but may only cross difficult terrain at half speed. The rider suffers -1 to his Leadership when trying to control the Boar. |
|
4
|
Iron Head. The head of the Boar is totally rebuilt out of metal, making it look even more vicious than before. The Doc adds to the effect by ‘accidentally’ re-plumbing the Boars digestive system so it breathes smoke and hisses nastily. The resulting beast looks so evil that not only does it cause fear, but its owner must pass a fear test before each game to pluck up the courage to ride it! If the warrior fails his test, he may try again at the start of each of his side’s turns- when he finally passes he arrives on a random table edge. If the warrior is part of a reinforcement group he will arrive with the rest of his group if he passes his fear test in time. |
|
5
|
Fuel-Injection Implant. Delving deep into the Ork racial memory, the Doc fits a big, red button just between the Boar’s ears, connected to an extensive Fungus fuel system. The warrior riding the Boar can press the button at the start of any turn. The implant increases the Boar’s movement by 2″ and gives the rider an extra attack. Whenever the button is pressed, roll a D6. On a 2+ the Boar is fine and the implant works normally. On a roll of 1 the Boar gives a shrill squeal and dashes off over the horizon, carrying the hapless rider with it. The Snorta is removed as if he had gone out of action, and will suffer a serious injury on a roll of 4+. |
|
6
|
Total Rebuild! The Doc’s really done it this time. He’s only gone and completely rebuilt the Boar! The result is possibly one of the only War Boars on Gorkamorka with wing mirrors.. The rider gains an additional +1 save modifier for all the tough metal plating, and +1 Leadership because the whole thing looks so impressive. There’s also enough space between the ears of the Boar to mount a single Kannon or Shoota (which can be fired by the rider instead of other shooting, and may be Kustomised), although this has to be bought seperately. Unfortunately, the thing doesn’t always, er, start. Roll a D6 before each game- on a roll of 1 the Boar isn’t working today, and its rider must stay at home. |
Download PDF
This document was written by Tim Peers. It’s licensed under a Creative Commons Attribution license.
 This may well have been printed in the Citadel Journal, but we can’t find any reference to it. It was in Gubbinz, a very out of print magazine for Gorkamorka which only made it to a single issue. We’ve also heard that only 5000 were printed, so worldwide it’s not exactly easy to find.
