First Dust Rat vehicles unveiled
Filed under: Campaign Stuff, Ere Be Stuff, Experimental, House Rules, Modelling, News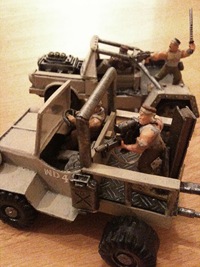 In April we had our last playtesting session for the Dust Rats, our new GoMo faction, but since then we’ve not said much. However, that shouldn’t be taken to mean that there’s been nothing going on, quite the opposite actually.
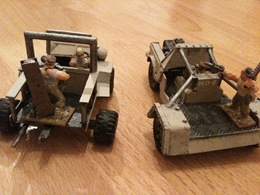
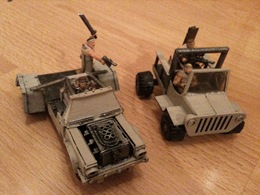
We’re not going to discuss the latest things with the rules right now, although we plan on having another playtesting session soon, instead this post is concerning the Dust Rats’ Light Recon Vehicle (LRV for short), the vehicle of choice for our first Dust Rat mob, Whiskey Delta 4.
LRVs, or "Recces", are weakly armoured wheeled vehicles used primarily for their manoeuvrability. Usually able to carry four to six Dust Rat warriors, these small trucks are excellent for quickly recovering scrap from the desert due to their light weight, unfortunately this does mean they are highly vulnerable to both enemy fire and ramming.
Stats:
| Score | Armour | Location/Damage | Score | Armour | Location/Damage | |
|---|---|---|---|---|---|---|
| 1 | 6 | Crew | 4 | 7 | Wheels | |
| 2 | 7 | Fixed Weapon | 5 | 7 | Driver | |
| 3 | 7 | Gubbins | 6 | 8 | Engine |
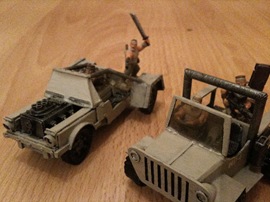 They’re not nearly as tough as Ork vehicles and don’t provide much protection for the crew which is precisely what we want. They’re also significantly smaller, with the number of warriors suggested in the flavour text. We’re not trying to stop you putting ten warriors on one with rules, but rather try to encourage players to treat the vehicle as a small transport, different from the SSV.
These two aren’t supposed to be the definitive interpretation of LRVs, but more a baseline for what kind of thing players should think of when they read that someone’s mob has one.
The small one is supposed to be about average whilst the larger one is a sort of upper limit on size. As long as the models are based appropriately, as all GoMo models should be, it’s easily possible to fit four models on the back of the smaller of the two LRVs.
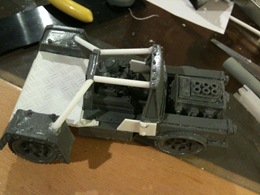
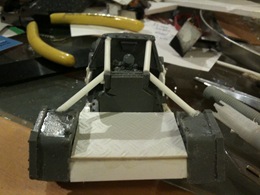
The smaller of the two is mostly scratch built with the addition of some GW wheels and a couple of bits from a toy tractor. The larger one is made from most of a Ramshackle Games “Death Rod” (the wheel arches are from another Ramshackle kit, but can be bought separately here), some plasticard and plastic rod:
The next Dust Rat vehicle will probably be the Dust Rats’ bike (based on this model from Ramshackle Games).
