When Gorkamorka was first released the Necrons didn’t officially exist, although GW had toyed with the aesthetic in Space Crusade for their Chaos Androids. They’d been planned though and hidden amongst the artwork for Gorkamorka was something rather familiar to modern players…

necron_skull_teaser

It was several months after Gorkamorka was released before the Necrons were launched. By modern standards it was a pretty subdued affair – initially there were only Necron Warriors and Scarabs. As part of that release push there was this showcase article on some rather good Necron-themed terrain, complete with an in-progress Adeptus Paleologos dig site. It’s from White Dwarf 220 and features the work of Dave Andrews, Owen Branham, and Mark Jones.

Heads up for those on mobile connections and similar – the file is about 15 MB.

Download PDF

139bIf you’ve ever even flicked through the pages of Da Uvver Book you’ll know that having a fort is one of the best things about Gorkamorka. The original game came with a cardboard one but that’s really more of a stop-gap until the glue has dried on the one on the workbench, ain’t it?

Originally from Citadel Journal 27 this article was primarily credited to Gary James, the founder of Terragenesis. There’s even a link to their old URL – altdorf.com/terragenesis

Of course that particular domain is long gone these days. Terragenesis is still accessible and the two forts featured in the original piece still have articles there with even more photos:

Gorkamorka Fort 1 (by Nikki, James, and Minkus)

Gorkamorka Fort 2 (by Mark and Stunty)

It was also republished in Gubbinz bundled with an article from White Dwarf 215 entitled “Mektown Madness: Markus’ Fort”. We’re working on getting hold of that article separately (the CJ article is reproduced identically in Gubbinz).

Download PDF

Before we go into scenarios for Da Town and the extra rules which exist you first need to understand a little about map layout.

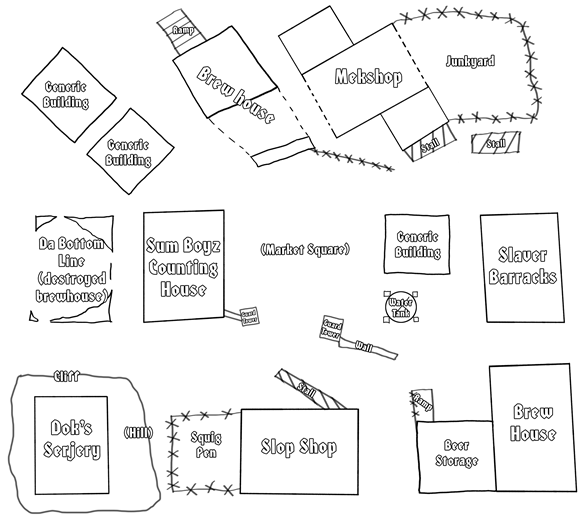
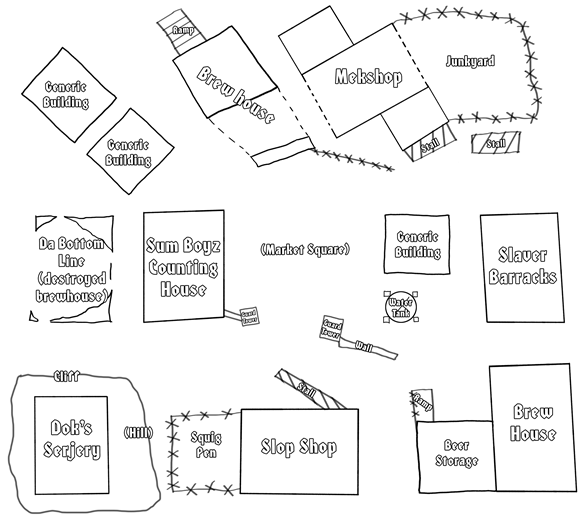
You’ve no doubt seen some photos of our buildings under construction but I don’t know if you realised that they were built to a careful plan. We could of course just create whatever shape of buildings we felt like but that could lead to some fairly unbalanced games. Instead we planned out a layout that would provide a nice mix of cover, bottlenecks, elevation, and general chaos.

da-town-map

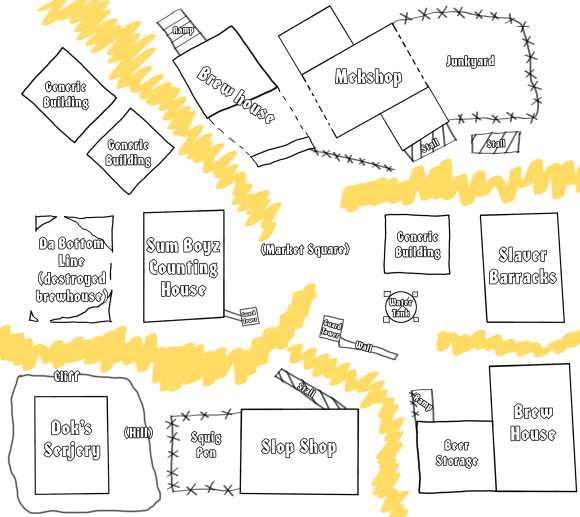
As you can probably see, in the middle there’s a big empty space, the market square. This serves as the focal point for the map as well as the main crossroads for all in-game traffic. Heading off it are multiple “big roads”:

da-town-map-big-road

The idea here was to ensure that there was at least three routes into or out of the square for vehicles. If a mob is trying to get in, or defend the area, there’s not just a single way in, forcing the players to spread their forces out.

The mekshop and brew house are not highlighted above as they don’t lead anywhere. In actuality they have arches allowing a vehicle to drive right through them, also handy as a deployment location for a scenario.

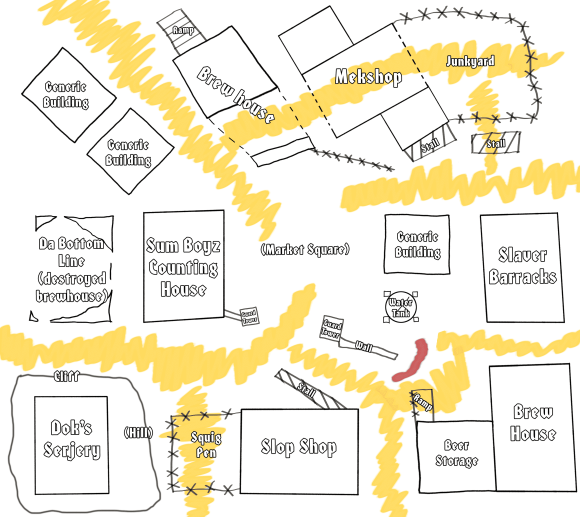
There’s also several breakable fences, should a player wish to risk smashing through them, highlighted below:

da-town-map-extra-big-roads

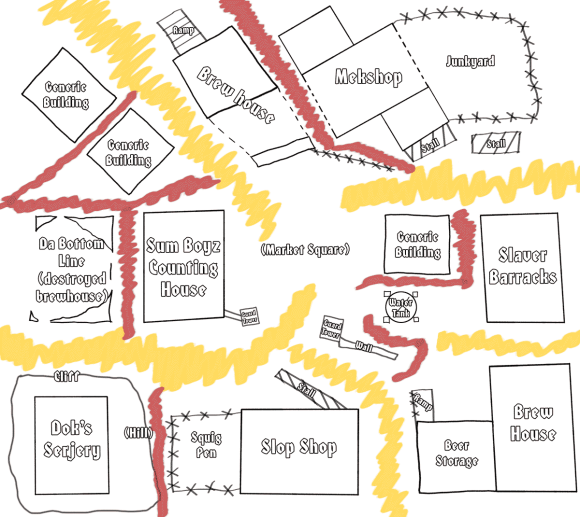
Next thing to point out is that in addition to those there are a great many places through which mounted models can find their way (i.e. Muties, Orks, Diggas, and Dust Rats on bikes, Feral Ork squig riders, Snortas, etc..). These are labelled below:

da-town-map-small-roads

As you can see, mounted warriors have a bit of an extra advantage here. Foot models can of course also use these routes but they don’t have the speed that mounts confer.

Returning to the main map there’s a the verticality aspect of things. Instead of the mostly flat plain that Gorkamorka is normally played on one instead has alleys, roof tops, and interconnected roof top escape routes. These walkways aren’t illustrated on the map as we tend to change them each game to keep things fresh. Some of the larger ones can also be traversed by mounts, allowing one to rain fire down from the roof tops. There’s nothing like a biker chasing a warrior throwing stikkbombs down on him!

da-town-map

The Dok’s serjery is on a relatively tall hill, creating a vantage point for warriors with decent ranged weaponry such as Muties, Diggas with archeotek gunz, and Dust Rats. On the other side of the map there’s the two storey slaver barracks, the mek shop, and the brew houses. Sluggas and six shootas can be handy in an alley but there’s something delightful about catching a warrior out in the open at range!

Next we’ll be providing the tiered rule sets for Da Town but in the mean time you should have a bit of a think about your town design.

Tags: ,

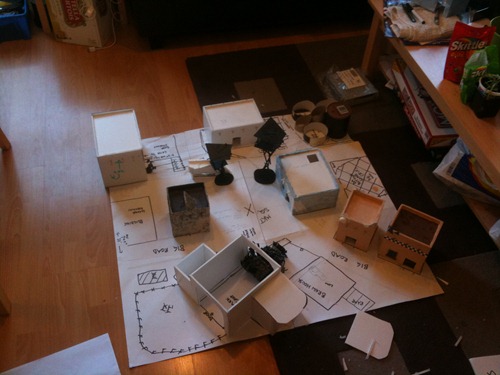
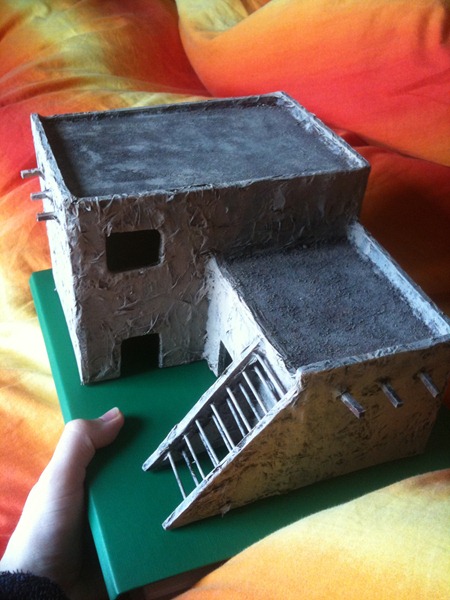
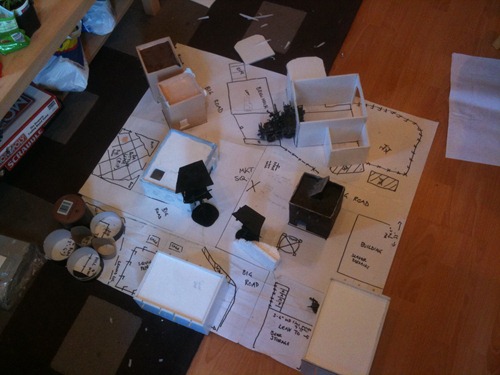
Greetings fellow Gorkers and/or Morkers! As part of the continuing tradition of Orktober, we present to you a look at what is coming up this week, Da Town, a little slice of Orky life outside the walls of Mektown.

IMG_0919

Da Town offers something that Gorkamorka tends to avoid on the basis of its difficult to manoeuvre vehicles inside an urban area and the best scrap tends to be found out in the desert. But scrap isn’t the only thing that has value on Angelis. Delicious fungus beer, squig meat, and slaves all have some value to all the parties out in the desert. Not to mention this is a place where the Big Mekz aren’t paying too close attention to what is going on, allowing Freebootaz and Bikerz to conduct their shady deals without worrying too much about what’s going on.

IMG_0942

In terms of mechanics the town opens up a host of new possibilities for how to handle movement and other special actions. However we know not everyone wants these so the rules for Da Town will be split into two parts, one set of Basic rules which only add a few things that aren’t covered by the stuff in the rulebooks and an Advanced set which will cover the more complicated actions that can occur. Scenarios will also have additional rules added which are optional for those who wish for a more involved experience and like things like NotMobz making their day better or worse. Either way if you’re just looking for some new terrain or want to add a new level of depth to the campaigns that you can conduct while playing Gorkamorka, Da Town has something for everybody!

IMG_0920

So over the next week or two we’ll have a bunch of stuff for you to look at and maybe implement yourselves. Flamekebab will be showing you how to construct these buildings for very reasonable prices, though little Grotz might need an adult to help them with the cutting of bitz. There’s also scenarios in the works which will be released, allowing for all mobs to have a go at the town as well as some mob specific ones that relate to the background of those mobs. Rebel Grotz in particular will gain their first unique scenario from the arrival of Da Town. More on that later. There’s also some good old fashioned Gorkerz vs. Morkerz stuff for all the purists out there who haven’t yet managed to scrounge up a copy of Digganob yet as well!

I’ve also put together a little bit of fiction to describe how this place came about and to describe the major players in Da Town who will also hopefully gain mini-campaign scenarios relating to them. There’s also a 3 scenario mini-campaign dedicated to Da Town which features some new mechanics and helpful rules clarifications for dealing with stuff that GW never dreamed of back in the day. Those intrigued should dust off their weapons and get ready to Goff Rok!

Good luck out there! Stay Green!

Tags: , ,
16 Aug 2011

Shadowbadger’s Angelis board

Filed under: Terrain

Shadowbadger has been doing some inspiring work over on Heresy Online creating a rather awesome board for Gorkamorka:

There’s some brilliant construction photos explaining how the effect was created. I’m tempted to do something similar with my board having seen this!

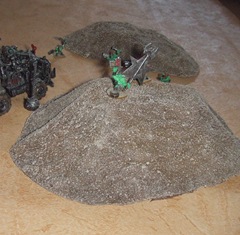
painted-2When I was first starting out in wargaming I was 12, I didn’t have much money, nor did I have access to much in the way of materials. So today I’ve written a guide for my 12 year-old self, or anyone in a similar position, to get some cheap terrain on their board.

These hills are easy to make and about as close to free as it’s possible to get. They’re relatively sturdy but are also light-weight, which is hopefully a good thing.

You will need the following:

-Flour
-Water
-Scrap paper
-Scrap cardboard
-Cardboard toilet rolls
-Some kind of tape (sellotape, ducttape, etc..)
-PVA glue or similar
-Sand
(-Paint)

You’re better off making more than one hill at a time as it seems to be virtually impossible to make a small amount of papiermâché glue. We made two, but that was mostly due to limited space and time. I may well make some more soon. A big thanks to Depiff for building these with me, always ready to lend a hand, it’s appreciated.
 

papiermache-goop

Step one: Make some papiermâché glue


Planning can wait until later – let’s get some raw materials on the go!
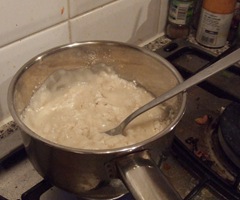
Heat up some water in a pan, it doesn’t need to be boiling, just kinda warm. Take a small amount of plain flour (other kinds probably work too) and drop it into the water.

I say “a small amount” because this is about ratio, not about mass. I used 100ml of flour which was far too much for this project. Try 25ml or 50ml. The water should be papiermache-goop-stirringfive or six times greater (i.e. 5:1/6:1) so 300ml water or 600ml, respectively.
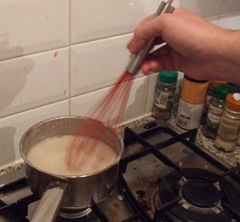
You’ll need to give it a good stirring and perhaps add more water if it’s getting too thick, it’s all a bit trial-and-error!

A minute or two later you should have a goopy white/grey mass. Pour it out into a bowl and set it aside to cool for a few minutes, you’ve now got time to plan.
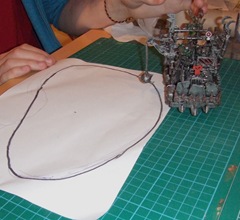


planning

Step two: Planning

You’re going to have to establish the height of your hills and the general shape and size. The first hill Depiff and I made was going to be quite a tall one, although this was a little unintentional. The central plateau of it is 5.5cm tall, which doesn’t sound that tall but is deceptively tall for a small hill.

Draw out a basic outline, ideally with a model to hand for scale purposes. At the same time decide whether this is going to be a bumpy hill, a crag, a cliff, etc..
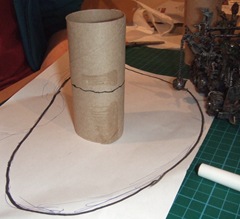


height-planning

Step three: Support structure

The toilet rolls are going to be your support columns inside the hill. Draw a rough line around where you reckon the hilltop should be and compare it to a vehicle. As I mentioned a moment ago, that line is 5.5cm from the base.

Next up, flatten the roll and use a knife or some scissors to slice it into the relevant height. You’ll probably use multiple toilet rolls for this, but that’s just fine, the more support, the better.

Now you’re going to need that scrap card. It doesn’t need to be thick – card stock, corrugated cardboard, whatever really. These are going to provide structure for the papiermâché to cling too. Try to avoid sharp points as they’ll show up. Slice it into triangles and angled pieces and tape them onto the toilet rolls.
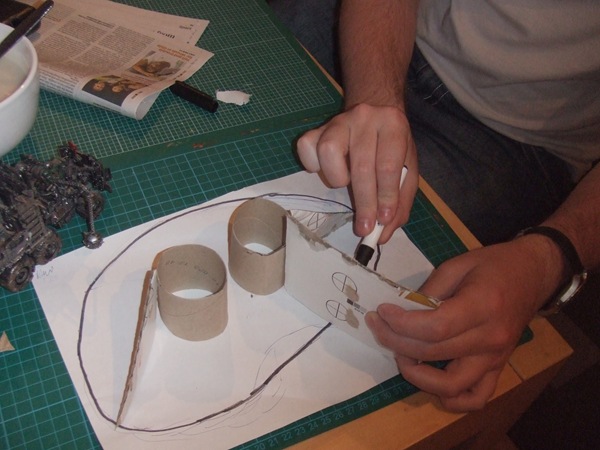
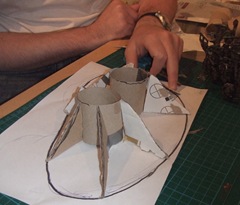
support-structure

finished-supports


They don’t need to be particularly sturdy as they’ll get entangled with the papiermâché , holding them in place. The more you use, the more defined your structure will be. Some things can be fixed later, but it’s better if you have a vague idea of what you want your hill to look like before you start coating it.
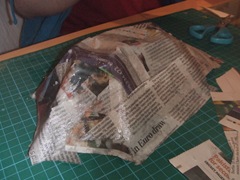


papiermache-coating Step four: Papiermâché


Now comes the messy bit, which is why there’s not many photos – both Depiff and I had our hands covered in papiermâché glue and couldn’t really stop to take photos. You don’t really need much direction at this stage though – take a strip of paper, dunk it in the glue, drape it over the structure, repeat.
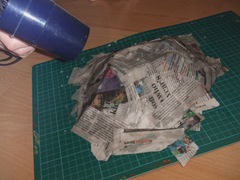
 

hairdryer-techniqueSome long pieces work well for establishing a basic structure, then smaller pieces can be used to add more well defined pieces.

To get the process done faster, use a hairdryer to dry the piece (as we so often do when building things). Once it’s relatively dry, add more papiermâché.

I would recommend doing this on a surface like a cutting mat – it can be picked up, rotated, and peeled away. We stuck our hill to it and then trimmed the scraggly edges.


Step five: Drying and basing

I’d recommend leaving your hill to dry overnight, unless you’re incredibly aggressive with the hairdryer. We tried to dry ours at a very rapid pace but it still took quite a while. The results weren’t bad though, so no complaints.

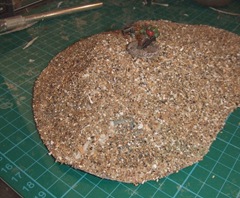
sand-coating

ready-for-paintingOnce it’s dry, dab on some PVA glue and dunk the whole thing in sand. Make sure you cover the entire thing as adding more glue later is irritating, but you knew that already.

Now you’ve got a choice – you can keep it as it is, covered in sand, or you can paint it. Personally I prefer my hills painted. It does have the advantage of holding the sand in place a little better, but it’s by no means compulsory.
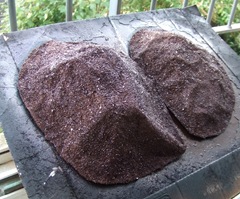


painting (Optional) Step six: Painting

I undercoat mine with a dark brown, then give them a moderate dusting of a colour approximating Snakebite Leather, followed by drybrushing with a lighter colour.

I’m not going to say this is the definitive method as I am fairly sure I could have painted them differently to make them look better, but I’m not going to repaint them. They’re good enough for me!


Here’s the finished hills:
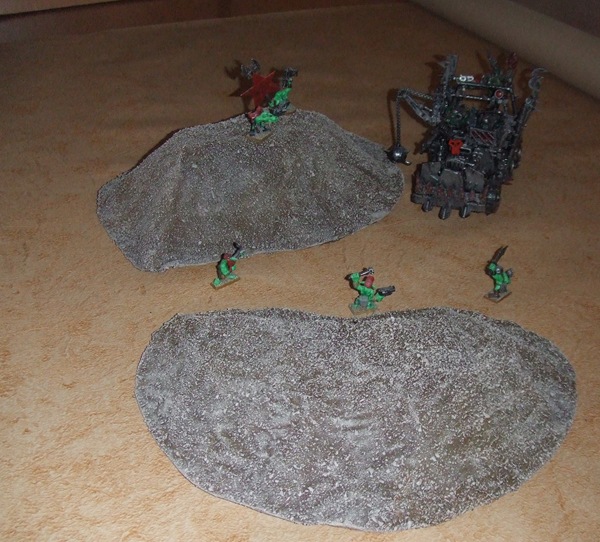
painted-1

Do you like them? Do you hate them? Could you teach me how to do better?
Comment and let us know!

20 May 2010

Spraypaint 101: Part 2 of 2

Filed under: Modelling, Terrain

It’s been quite a while since I wrote part one of my spraypaint guide, but here’s the second half.

Caps

grsdet_SprayPaintNozzle As I mentioned in the first half, caps matter when painting which is clearly explained by the painting company tempe. There are a whole variety available, more than I can even tell you about as shown on Stubbins Painting San Diego`s website, but you don’t need to know everything, just what works well. If you buy low quality spray paint you’ll probably get a cap that looks like this one.

Perhaps this isn’t true of all low quality paint, but in my experience it’s true. It’ll give a relatively thin line of paint, splatter everywhere, and not forgetting its miraculous ability to leak all over you.

If you’re buying paint from a store that sells graffiti paint (my current favour is the Monster Colors online store) then it should be easy to pick up some caps at the same time. Don’t worry, they’re quite cheap (~£2 for ten at the time of writing).

The two kinds of caps I’d recommend for spray painting models are fat caps such as “pink dots” and calligraphic caps. The former is a wide spray that should allow you to quickly cover a vehicle or piece of terrain in a few passes, the latter provides a thin line of paint that can quickly be passed over things. By “a thin line” I am referring to a sort of fan shape that can allows a screen of paint to be run over models – it’s my cap of choice for most things, including individual miniatures, although it does require much quicker strokes.


Preparing the model

This is one of the reasons I favour spray paint intended for graffiti – it sticks to just about anything. Whilst other paints might require you to carefully wipe models down and prime them, that doesn’t apply with decent graffiti spraypaint. Make sure they’re not too dusty (you want to paint the model, not the dust) and then start spraying!
 

Technique

IMG_4072-1The way the paint is used is pretty important and I’ve seen a lot of people treat it as if a slow and deliberate coat is the only way something will stay painted. Actually, that’s the exact opposite of what you want to achieve. Quick coats are far better for models, otherwise you’ll find you’re clogging the model with paint and destroying all the details with large gobs of paint.

Before I continue, I want to mention drying time – graffiti spraypaint is designed for just that – graffiti. What this means is that it’s designed to dry quickly, stick to itself and not have many issues with what is being painted (hence why no primer is needed). What this means is that a quick coat will dry in seconds. I’m impatient and it’s often cold outside, so the sooner I’m done painting, the better.

This means that when painting, you only need to spray a thin coat, perhaps reposition it a little and then spray again. As long as you keep the coats quick and light, the model will have dried by the time the next coat is applied. This is NOT true if you use crappy paint, so be careful. You’ll be wanting to spray the model from a distance of somewhere between six and twelve inches, sometimes less, sometimes more. I don’t measure, I tend to just go with what feels about right. Here’s a video so you can see what I mean:

Once you’ve painted the model, give it a little while to dry (drying can be sped up using a hairdryer) and check it somewhere with even lighting to see which bits you’ve missed. If you got it all first time, well done, if not, take it outside and give it another blast.

Final quick tip – if you’re painting individual warriors, try sticking them to the edge of a cereal box. That way you’ve got a convenient way to pick them up and get them from different angles to ensure decent coverage.

If you have any questions, leave them as a comment and I’ll do my best to answer them!

16 May 2010

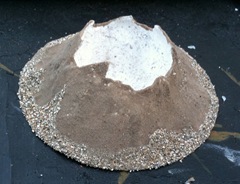
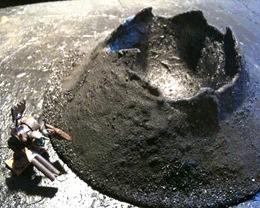
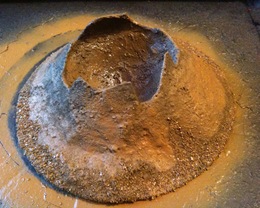
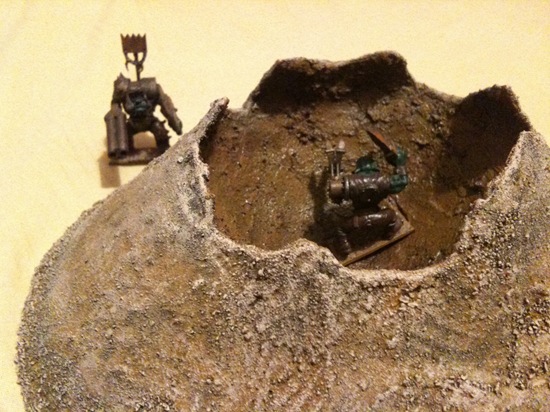
A crater? A geyser? A volcano?

Filed under: Terrain

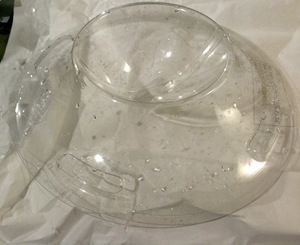
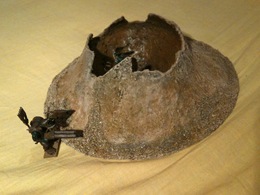
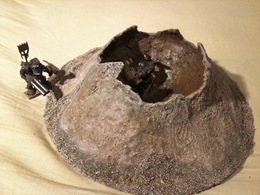
easter-egg-baseGiven how busy all of us here at tUGS have been lately, it’s understandable that we’ve got a few bits of junk lying around. One of the bits that has finally reached the top of the heap is part of an Easter egg box. My girlfriend (Gorkers, Da Not So N00bz) suggested it be used for a crater or similar, an idea which immediately appealed.

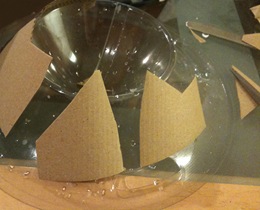
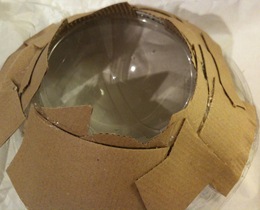
I figured the plastic itself would be a nightmare to get spackle to stick to, so the first step was to build up some structure to create a skeleton for the polyfilla to build on.

Hot glue was used for this, in conjunction with a load of old coffee cup heat shields, provided again by my other half. These were ideal for this as they had a natural curve to them, helping them wrap around the curvature of the plastic, uh, thingy.

base-card-layer top-card-layer

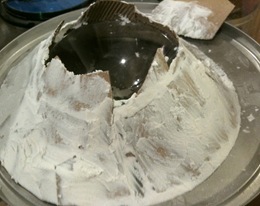
With the card firmly in place, I started adding pre-mixed filler to the structure, which was then left to dry over night. In the morning a few areas were added to and some PVA glue was added to the empty centre to create an initial layer for adherence. Later some of the chunky seashell sand I use was added to this area, creating a texture that would hold filler. Once that was dry, a final, smoother coat of filler was added. Not too smooth, mind you. It’s supposed to be rocky, so no need to be too careful.

base-filler-layer top-filler-layer

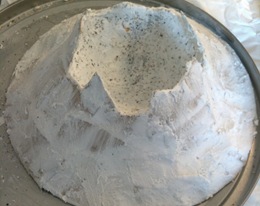
sand-addedThe final stage of construction was to add fine grain sand to the piece, excluding the centre. This took several layers and was held on by PVA glue, a process which was aided significantly by my trusty hairdryer. What can I say, I’m impatient!

Once the thin sand was on, I wanted it to blend with the basing of all the rest of my terrain, so I added some of the shell sand to it around the edges and scattered patches across it where it seemed sensible.

With that it was outside to paint it black and add the other base colours, dark brown for the centre, a faux Snakebite Leather for the rest.

base-coat browns

Lastly it was drybrushed with a lighter brown colour on the outside (as per the base painting here) and a little Bestial Brown on the inside to dull down the glossiness of the paint. There we go, finished!

finished-1

 finished-3  finished-2

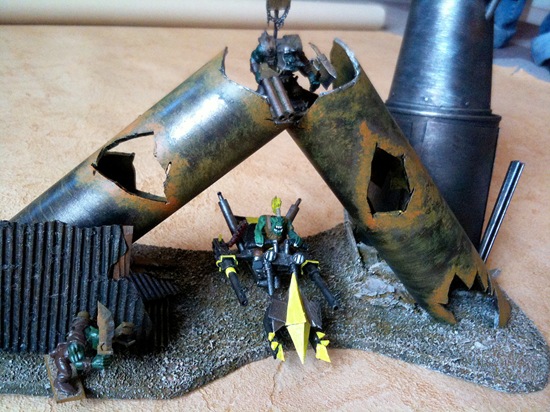
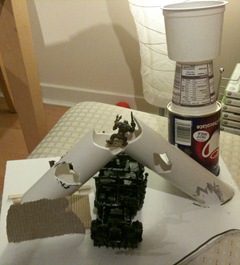
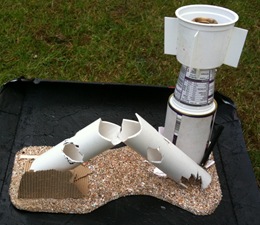
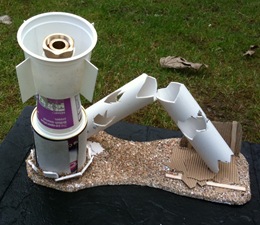
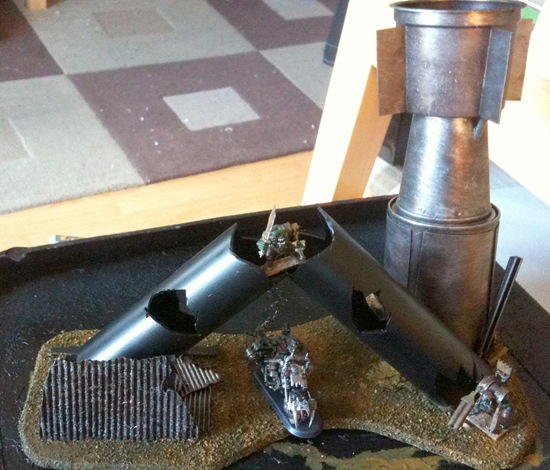
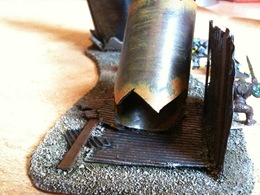
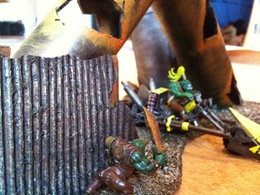
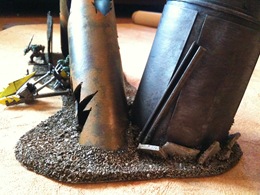
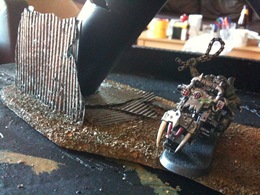
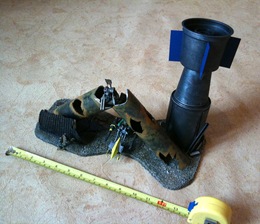
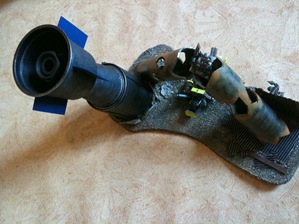
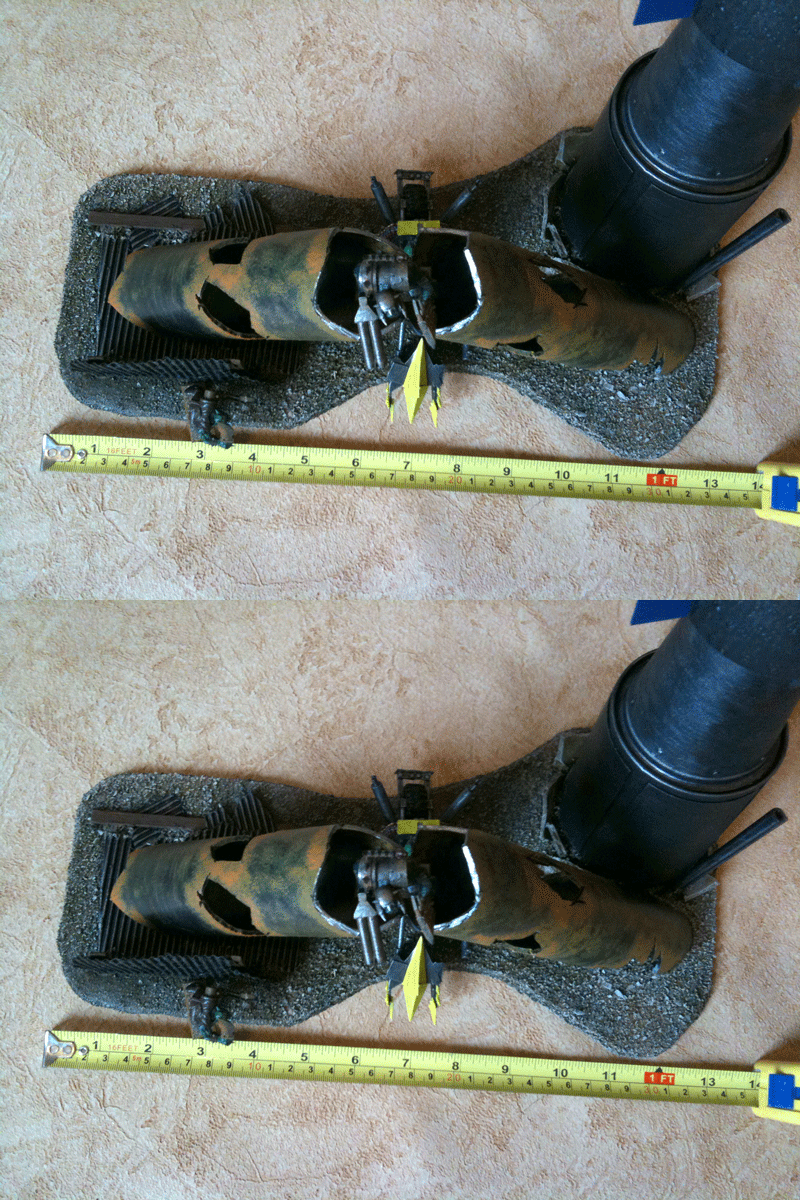
Recently Tristan from Terrain From Junk held the site’s first terrain building contest. He asked for pieces that were 36”² or more and built from some of the types of junk he’d already listed on the site. I took it upon myself to enter a piece, if anything just to get through some of the junk I had building up around my flat.engine-crash-finished

A while ago there was some renovation work going on nearby and on our way back home Ross found a medium sized PVC tube which he donated to me.piping


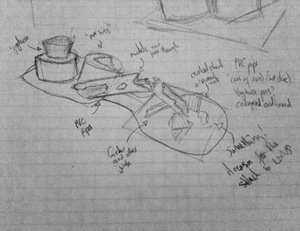
So gathering up a few other bits and pieces I set to work on an entry, to be finished in a couple of days, in between revising for my HRD exam. I also used:da-plan

  • -Wooden coffee stirrers
  • -Corrugated cardboard
  • -Tub of hot chocolate
  • -A couple of yoghurt pots
  • -A few pieces of plasticard and some other odds and ends

I drew up a rough idea of what the piece should look like, although the finished version isn’t quite the same and I never did figure out why there had been a shack there.

construction

The general idea was to create a piece that indicated the presence of a large amount of scrap below the ground, or possibly as if a large lump of the space hulk had torn off hurling engines in all directions as it broke up.

I imagine the pipe as part of a connective structure in a bank of many similar engines that has been decaying slowly and recently was blown over, crushing the nearby shack.

In terms of gameplay I wanted to build something that would be big enough for most normal vehicles to pass under it, rather than being entirely blocked by it. I also wanted to provide a bridge for foot models, allowing combat to occur around it and to create a tempting vantage point. There’s entrances at both end of the pipe to encourage its use (and to prevent any one model being impossible to flush out).

A combination of PVA glue and hot glue were used to hold the whole thing together – hot glue where a quick bond was required and PVA where it could wait.

front-based back-based

I added some detailing to the engine itself, although I really wanted to add more. Sadly I didn’t have the parts, nor the time, to add them. Let the chips fall as they may!

basecoats It was spraypainted black and the base was given a rough coating of Snakebite leather. Essentially I followed the same painting procedure as for my mutie tent, the rest is mostly just drybrushing Tin Bitz and Boltgun Metal, although I did the rust using this method, et voilà:

engine-crash-finished

That’s pretty much it. Here’s some more photos, or thumbnails at least. Click on them to see larger versions.

extra-3 extra-2 extra-1 unfinished-extra extra-4 extra-5

Lastly, I’ve got this one. I took two photos that ended up so close together that they give a faux-3D effect when viewed as an animation. The image links to a larger version of it.

faux-3d

24 Mar 2010

Make some rocks/Rock Spires

Filed under: Terrain

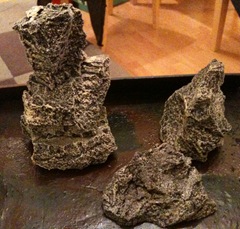
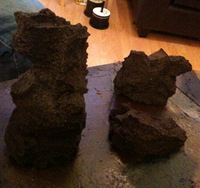
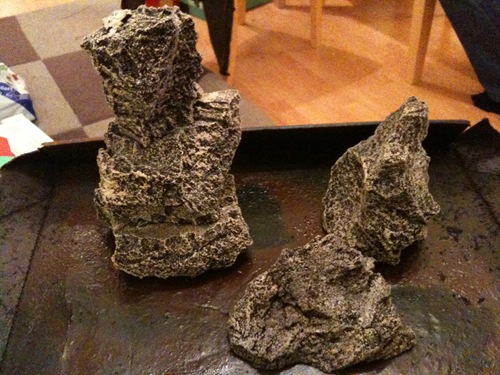
IMG_2346Now that there’s quite a few battle reports on the site you may have noticed some of the terrain we use including the rather nifty rocky outcroppings. If you don’t think they’re any good, that’s fine too, but here’s how we made them.

A friend of mine made some large puppets a while ago and used large amounts of foam to make them. Afterwards he had several big blocks left over and offered them to me for a pittance. At the time I wasn’t sure what I’d use them for but then I read a tip on Ironhands.

So, a Sunday afternoon was spent making some rocks and the method goes something like this:


    IMG_2336


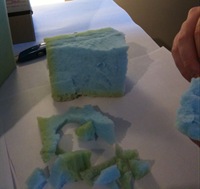
  1. Decide on the rough size of the rocks and take a suitably large chunk out of your foam with a knife or a pair of scissors. You’re not going to need masses, but bear in mind that you’ll be stacking pieces.

  2. Start tearing off large lumps of foam from the offcut, about the size of the one in the photo. They can of course be both bigger and smaller, but we found that this size worked relatively well.

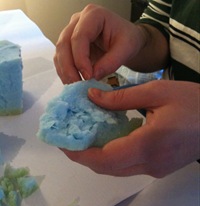
  3. To get IMG_2337the rocky texture, trim chunks off them with your fingers. The foam tears relatively easily – don’t use a knife. By tearing them you’ll end up with a decent rough texture, rather than neatly flat sides (we’ve got one column that has neat edges that we haven’t replaced – it looks ridiculous by comparison to the new ones).
    One side note – DON’T THROW AWAY THE BITS YOU REMOVE! Seriously, they’re useful later.

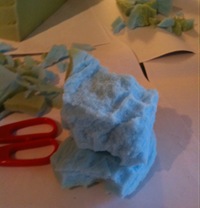
  4. Once you’ve got your basic rocky blocks, try stacking them on top of each other until you find some you feel fit rather well. They shouldn’t fit perfectly, but some pieces seem to naturally balance on top of each other in a
    visually pleasing way. IMG_2338At this point you’ll also find out whether the stacks are stable enough on their own – if they aren’t, grab a bamboo kebab skewer and push it through the middle of the foam. You can then trim it so it doesn’t stick out at either end, it’ll be fine.

  5. To glue them together you’ve got two options – PVA glue (white glue, presumably equivalent to Elmers in the US) or hot glue. Hot glue works relatively well if you’ve only got a small base to glue to, but in general PVA works best. Get a suitably large dollop and put it between the stacks where they contact. If you get some on the rest of the rocks, don’t worry, you’ll be giving them a coating
    of the stuff later anywayIMG_2340.

  6. Once the stack has dried (you can speed it up with a hairdryer if you’re impatient like us) you should have something like this. Now for the lame bit – you’re going to have to coat the whole exterior in watered-down PVA. Preferably two coats, really. This may seem like pointless busy work but it’s not. If you try to spraypaint raw foam it just sucks up the paint like a sponge (I can’t imagine why..). By sealing it you save yourself paint and time later, it also makes it possible to drybrush it later.

  7. So once you’ve got the columns reasonably sealed
    (once again,IMG_2341 you can use a hairdryer to get them ready for painting more quickly) it’s time to paint.

    Get some flat black spraypaint (I suppose you could use gloss if it rocks your boat..) and give the rocks a few coats. Let them dry (hairdryer) and then examine them for bits you’ve missed. Flip them over if required and get the rest properly undercoated. Once that’s done and they’ve dried properly you can start with the more hands-on painting.


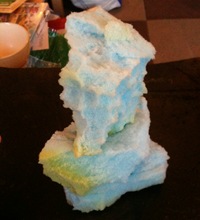
  8. We used a couple of different colours to paint ours, both of them were sample packs of water-based acrylic paint for interior decoration. A small-ish house painting brush (trimmed down a little to facilitate dry-brushing) was used to semi drybrush. Don’t actually drybrush, but don’t overload the brush as it’s difficult to spread out the paint later. Each rock is pretty quick and the black undercoat looks after all the shading for you:

IMG_2346That’s your first rocks finished.

Closing notes – earlier I told you to save the offcuts – they were glued onto some of our other rocks and the smaller pieces were scattered on a base of foamboard to provide some difficult terrain (rather than impassable).

Also, you might want to provide some flat (ish) parts of the rocks to stand models on. That’s up to you, really.

Hopefully this’ll help you get yourselves some cheap rock spires for your boards – we love ours!
They’re great for crashing buggies into, hiding scrap behind, and using for cover if you’re a sneaky mutie!

13 Jan 2010

Spraypaint 101: Part 1 of 2

Filed under: Modelling, Terrain

In my recent terrain article I gave a few bits of advice on spray paint, I actually went a bit overboard I feel, given that I was trying to just mention the subject. Then again, it’s a subject that is pretty important in my eyes, so this is actually going to be my first two-part entry.

I could go into why to use spray paint, but I don’t think it’s worth it. If you want to use spray paint, I’m sure you’re already aware of some of the reasons. Instead I’m going to give some tips on paint selection and protection. You can also contact experienced HSP Painting Contractors to get more tips. I also apologise for the UK-centric nature of many of the bits of advice I’m going to give, but there’s probably plenty of stuff for those of you in the US. As for the rest of the English-speaking world, I’m afraid I can’t help with where to get paint – I don’t imagine it’s easy to get hold of in Australia, for example.cccp I favour paint designed for graffiti simply because it’s leagues ahead of anything else I’ve tried.

Characteristics of spray paint

  1. Coverage
  2. Consistency
  3. Cap
  4. Pressure

Not in that order, admittedly, I just wanted to spell CCCP.

Coverage

Depending on the manufacturer and techniques used, some paint cans contain more than others. I don’t know whether it’s just marketing noise or not, although I’m inclined to believe in “double thickness” claims by some manufacturers. Low quality paint cans don’t contain as much paint and quickly run out, make sure the paint you get has decent coverage or you’ll end up needing to buy more all the time. A single 400ml can should easily cover many terrain pieces and a crazy amount of miniatures.

Consistency


Generally-speaking the paint you’ll want to use should be quite thick. Runny paint quickly drips and ruins surfaces with built up paint where it has collected. Good quality paint sticks and stays there unless you lay it on insanely thickly – it’s designed to stick to vertical surfaces if it’s for graffiti – drips are a huge no-no on the graffiti scene, after all.

Cap

I plan on explaining more about caps in the second part, but let’s just say this – if your paint comes with a tiny cap on top, chances are it’s garbage. All the good quality paint I’ve bought either has no cap or a chunky cap. By “tiny” I don’t mean the spray it produces, I mean the physical size of the white lump of plastic.
Low quality paint often comes with a cap that is not only gives a terrible spray shape, but also leaks. Not good!

Pressure

This was something I learnt about later and recently noticed properly for the first time. Low pressure paint is a lot more controllable, it’s easy to press the cap just slightly to add a few finishing touches without showering a thick layer of unwanted paint on whatever you’re coating.
Good quality paint shouldn’t be high pressure, unless that’s its selling point (high pressure isn’t bad per se, it’s just not desirable for our purposes). Check the can to be sure it says “low pressure”.

Bad paint

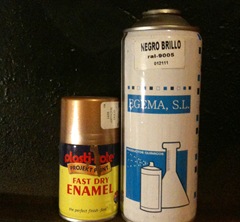
bad-paintIn a great many shops one can buy plasti-kote paint, either in small tins as seen in the photo, or in bigger tins (400ml). It’s runny, high pressure, supplied with a terrible cap and takes many coats to become properly opaque.

On the right is a can of some random stuff I got along with some other stuff. It’s essentially a no-name brand of paint and is both irritatingly glossy, high pressure and drippy.

Now, this is at least somewhat excusable because it cost me next to nothing (I think it was part of an offer on a site and I was curious). Plasti-kote on the other hand is NOT cheap – that can of gold set me back £2.99, according to the label at least (I needed it at a few hours notice).

I’ve done a quick check online for the 400ml tins and am getting results between £6 and £10. Six pounds for a can of terrible paint, dear gods..

Good paint

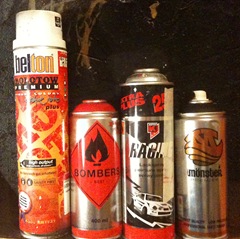
good-paintHere’s a selection of some of the brands of paint I’ve tried and liked, from left to right: Belton, Bombers Best, Racing and Monster Colors.

Of these, my two favourites are Monster and Bombers Best, although they’re all good.

Other notable brands include Molotow, Montana and MTN.

None of these cans cost more than £4, I think. Well, the Belton might have, but the Bombers Best was £2.25 I think, £2.99 or so for the Racing and £2.95 for the Monster.

As you can see, the price is far more reasonable and the product much higher quality.

Protection

protection

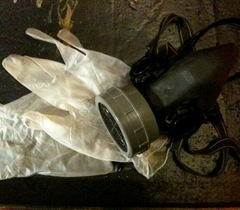
Finally, safety first (hah). Ideally, wear a gas mask, not just one of those papery covers for your mouth – the gas is just as bad as the particles. A gas mask won’t set you back much, £10 – £30, depending on your choice. It’s worth it for your body’s sake.

A handy addition is latex gloves, not required, but useful. They stop you getting paint on your hands (this stuff isn’t water soluble!) and makes handling painted stuff a lot easier whilst it’s drying.

I’d also recommend a decent layer of cardboard or newspaper to protect the surface you’re painting on – I use half an old pizza box.


That’s about it for this tutorial, you can read the second part here. Any questions? Leave them in the comments below.

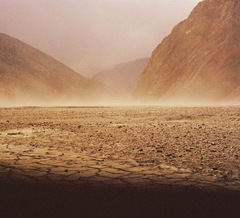
desert-perilsA long time ago, back when Gorkamorka was still supported by Games Workshop, White Dwarf had an issue dedicated mainly to the Dark Eldar, the newest race for 40K at the time.

Personally I never liked them much and didn’t buy that issue. A friend had it and I must have looked through it once or twice. Unfortunately, recently I learnt that the hazardous conditions rules for Gorkamorka were published in that issue!

What are they?

Well, Necromunda had them, I think Mordheim too. They’re extra rules that make play a little more interesting. I don’t know whether I’m going to use them myself, but it annoys the hell out of me that they’re not available online, or anywhere else for that matter.

Thankfully, copies of White Dwarf 227 are still out there and I got my grubby mitts on one from an eBay seller. Score! Well, one scanning session later and I present it here for all to find.

As with all official stuff, it’d be nice if GW could see their way to publishing them on their own site, but until then, here it is:

Download PDF

(image by Nimrod Bar licensed under a Attribution-Non-Commercial-Share Alike 2.0 license)

12 Jan 2010

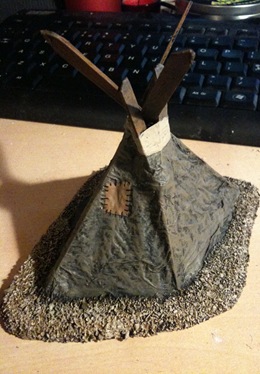
Make a Mutie tent

Filed under: Terrain

IMG_2329

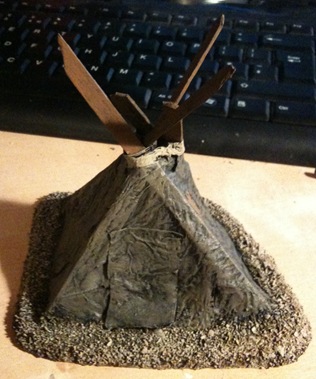
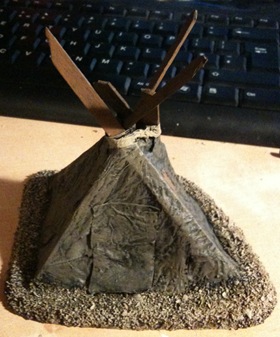
I felt like trying to build a cheap terrain project this evening, so I set about building a Mutie tent, inspired by the card ones in the Digganob box.

As you can see, the end result isn’t too bad.

These tents are fun to make, cost basically nothing (the paint and foamboard off-cut are probably the dearest) and best of all – they’re functional in-game:

Mutie tents block line of sight normally, and models on foot inside a tent cannot see out or be seen. Vehicles which move into a Mutie tent, voluntarily or otherwise, suffer no damage but stop moving immediately. A tent is destroyed if a vehicle moves through it. At the start of each subsequent turn, roll a D6. On a roll of 1, 2 or 3 the tent is wrapped around the vehicle obscuring the driver’s vision. The vehicle will move out of control as if it had no driver. On a 4, 5 or 6 the tent has been shredded and falls to one side, allowing the vehicle to move normally from then on (no further rolls are needed).
-MUTIE TENTS (Digganob, page 79)

To build one you will need the following:

  • Wooden stirrers/ice lolly sticks (“popsicle sticks”)
  • A few sheets of tissue paper, such as kleenex
  • PVA glue (white glue, uh, “Elmers”?)
  • A little string or wire

For basing you’ll need some card or foamboard and a bit of rough sand (I got mine from a nearby beach, it’s made of crushed shells).

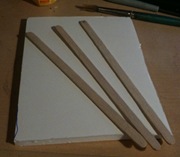
IMG_2307To start off with, I selected a suitable bit of foamboard for the base and decided the rough shape of my tent.

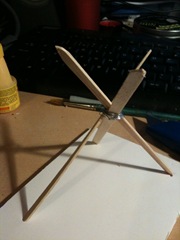
Then I chopped/cut at the wooden sticks in order to remove the rounded tips. On one end of each I created a short, sharpened point.


IMG_2314That done, I used the point to pierce the top layer of card on the foam board and positioned them so they crossed. Once that was done I used a little metal wire to wrap around the top, holding them together, although thread or string would have been just as good.
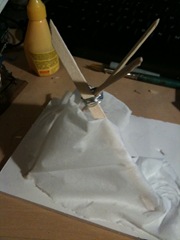
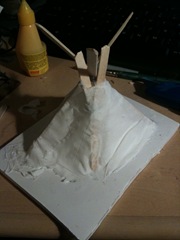
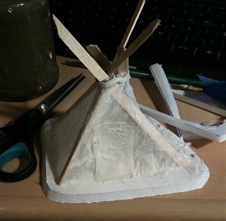
Later I added a Y-shaped beam made from two pieces spliced together, but I’ve no photos as I tried that after adding the first layer of tissue paper.

I’d originally planned to put a raised door on the tent (like the card ones) but I felt that it didn’t quite work using the materials I had to hand, so the plan was changed.


IMG_2316  IMG_2317

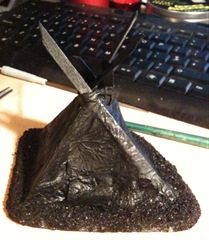
For this I used PVA glue, putting some around each hole in the foam board to secure the bases of the poles, I also applied a thin layer to each so that the paper would stick. Each piece would be carefully torn to about the right shape and then wrapped around.

Then I used some diluted PVA glue (about the consistency of paint) and painted over the paper, taking care not to tear it. After it dried, I added a few details – a patch to cover where I made a small hole accidentally, a bigger patch for a door and a tightly wound piece to act as a draping strap around the top:

IMG_2319

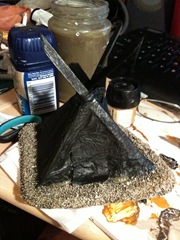
After that was done, I took a sharp knife and carved out a base from the foamboard, keeping a small edge, but not too much. I also made sure to make the edges sloping, rather than an abrupt end to the base.

Using yet more glue I painted the base, making sure to not get much on the tent (which was dry by this stage). Dunking it in sand and tapping off the excess gave the result you can see in the following photo.


IMG_2320At this stage I should probably share how I kept moving so quickly – I cheated. I had a hair dryer with me the whole time and would use it to quickly dry the glue (and later the paint) so that I’d be able to keep going at a decent pace. This probably prevents it from being as sturdy as it could be, but whatever – it’s a model and should be handled with care regardless.

Next up was the undercoat. In this case I used Signal Black “Monster Premier” spray paint. I give the brand because it’s paint designed for graffiti. If you’re in the UK or anywhere else that sells that gods-awful Plastikote crap, never buy it. It’s high pressure, low quality and drips like crazy, not to mention being very expensive. I think I paid about £2.95 per can of Monster, available from their site. This stuff is double-thickness (so each can contains a fair bit), it’s also hard-wearing and sticks to just about everything, IMG_2323no cleaning or preparation required. Lastly, it’s low pressure, this means you can easily spray small bursts carefully with it – ideal of going over those bits you missed!

Oh, one more thing – because it’s designed for graffiti, it dries very quickly. This stuff will be dry to the touch within a minute or so. I went over mine with a hair dryer and then snapped this photo.


IMG_2325

Here I’ve painted the base with a watered-down dollop of “Snakebite Leather” (Citadel) although I often use “Leather Brown” (Vallejo). I’ve also found that for bigger pieces, “Sand Brown” from Monster Colors is about right.

Once that was dry (hairdryer to the rescue!) I drybrushed on some paint from one of my Dulux tester pots, “Cookie Dough”.

You may of course want to base and paint yours differently.

To paint the wood I used Bestial Brown or equivalent, watered-down. A mixture of browns drybrushed onto the tent itself gave the colour you saw at the start of the article (I used a fine-point permanent marker to do the stitching on the little patch).


   IMG_2329 IMG_2330

There you have it, one simple Mutie tent!

Tags:
18 Dec 2009

Sand, Nothing But Sand..

Filed under: Terrain

sand-nothing-but-sand

Here’s an old WD article from WD 219, April 1998, written by Adrian Wood. It’s not particularly great, but worth a look if you’re just starting out building terrain.

No game of Gorkamorka is complete without terrain to fight over. The Gorkamorka boxed game itself has lots of card models inside to get you started from the amazing card fort to the plastic sprues which contain oil drums, barricades and fuel cans. But have you ever though about making some of your own Gorkamorka terrain to go alongside it? Grand Warlord Adrian Wood has a go…

Download PDF